
<이전글 1 - OAuth2 기본 개념>
[스프링 부트 3] OAuth2 - 1 (OAuth란?, 권한 부여 코드 타입 승인의 흐름, 쿠키란?, 토큰 발급받기)
1. OAuth1-1. OAuth란?OAuth : 제3의 서비스에 계정 관리를 맡기는 방식이다. 흔히 볼 수 있는 네이버로 로그인하기, 구글로 로그인하기 같은 방법이 있다. 리소스 오너자신의 정보를 사용하도록 인증
jhzlo.tistory.com
<이전글 2- Oauth2 서비스 구현하기>
[스프링 부트 3] OAuth2 - 2 (스프링 시큐리티로 OAuth2 서비스 구현, 로직 세팅)
[스프링 부트 3] OAuth2 - 1 (OAuth란?, 권한 부여 코드 타입 승인의 흐름, 쿠키란?, 토큰 발급받기)1. OAuth1-1. OAuth란?OAuth : 제3의 서비스에 계정 관리를 맡기는 방식이다. 흔히 볼 수 있는 네이버로 로그
jhzlo.tistory.com
1. 글에 글쓴이 추가하기
글에 글쓴이를 추가하는 작업을 진행
◆ domain/Article.java
public class Article {

    @Id // id 필드를 기본키로 지정
    @GeneratedValue(strategy = GenerationType.IDENTITY) // 기본키를 자동으로 1씩 증가
    @Column(name = "id" , updatable = false)
    private Long id;

    @Column(name= "title", nullable = false)
    private String title;

    @Column(name="content", nullable = false)
    private String content;

    @CreatedDate // 엔티티가 생성될 때 생성 시간 저장
    @Column(name = "created_at")
    private LocalDateTime createdAt;

    @LastModifiedDate // 엔티티가 수정될 때 수정 시간 저장
    @Column(name = "updated_at")
    private LocalDateTime updatedAt;

    @Column(name= "author", nullable = false)
    private String author;

    @Builder
    public Article(String author, String title, String content){
        this.author = author;
        this.title = title;
        this.content = content;
    }

    public void update(String title, String content){
        this.title = title;
        this.content = content;
    }
}
author 변수를 추가한다.
이후 빌더 패턴에서도 author를 추가해 객체를 생성할 때 글쓴이를 입력받을 수 있게 변경한다.
◆ dto/AddArticleRequest.java
@NoArgsConstructor // 기본 생성자 추가
@AllArgsConstructor // 모든 필드 값을 파라미터로 받는 생성자 추가
@Getter
public class AddArticleRequest {

    private String title;
    private String content;

    public Article toEntity(String author){
        return Article.builder()
                .title(title)
                .content(content)
                .author(author)
                .build();
    }
}
기존 글을 작성하는 API에서 작성자를 추가로 저장하기 위해
toEntity() 메서드를 수정해 author값도 추가 저장하도록 변경한다.
◆ service/BlogService.java
@RequiredArgsConstructor // final이 붙거나 @NotNull이 붙은 필드의 생성자 추가
@Service // 빈으로 등록
public class BlogService {

    private final BlogRepository blogRepository;

    // 블로그 글 추가 메서드
    public Article save(AddArticleRequest request, String userName)
    {
        return blogRepository.save(request.toEntity(userName));
    }
save() 메서드에서 유저 이름을 추가로 입력받고
toEntity()의 인수로 전달받은 유저 이름을 반환하도록 코드를 수정한다.
◆ controller/BlogApiController.java
public class BlogApiController {

    private final BlogService blogService;

    // HTTP 메서드가 POST일 때 전달받은 URL과 동일하면 메서드로 매핑
    @PostMapping("api/articles")
    // @RequestBody로 요청 본문 값 매핑
    public ResponseEntity<Article> addArticle(@RequestBody AddArticleRequest request, Principal principal) {
        Article savedArticle = blogService.save(request, principal.getName());

        // 요청한 자원이 성공적으로 생성되었으며 저장된 블로그 글 정보를 응답 객체에 담아 전송
        return ResponseEntity.status(HttpStatus.CREATED)
                .body(savedArticle);
    }
현재 인증 정보를 가져오는 principal 객체를 파라미터로 추가한다.
인증 객체에서 유저 이름을 가져온 뒤 save() 메서드로 넘겨준다.
◆ dto/ArticleViewResponse.java
public class ArticleViewResponse {

    private Long id;
    private String title;
    private String content;
    private LocalDateTime createdAt;
    private String author;

    public ArticleViewResponse(Article article){
        this.id = article.getId();
        this.title = article.getTitle();
        this.content = article.getContent();
        this.createdAt = article.getCreatedAt();
        this.author = article.getAuthor();
    }
}
글 상세 페이지에서 글쓴이의 정보가 보여야 하므로 author 필드를 추가한다.
◆ data.sql
INSERT INTO Article (title, content, author, created_at, updated_at) VALUES ('제목 1', '내용 1', 'user1', NOW(), NOW());
INSERT INTO Article (title, content, author, created_at, updated_at) VALUES ('제목 2', '내용 2', 'user2', NOW(), NOW());
INSERT INTO Article (title, content, author, created_at, updated_at) VALUES ('제목 3', '내용 3', 'user3', NOW(), NOW());
data.sql 파일에 author 컬럼을 추가한다.
◆ article.html
--- 생략 ---
<header class="mb-4">
    <h1 class="fw-bolder mb-1" th:text="${article.title}"></h1>
    <div class="text-muted fst-italic mb-2" th:text="|Posted on ${#temporals.format(article.createdAt, 'yyyy-MM-dd HH:mm')} By ${article.author}|"></div>
</header>
--- 생략 ---
뷰에서도 글쓴이의 정보를 가져올 수 있게 코드를 수정한다.
>> 모든 비즈니스 로직이 완성
2. OAuth 뷰 구성하기
1단계 : controller/UserVieController.java
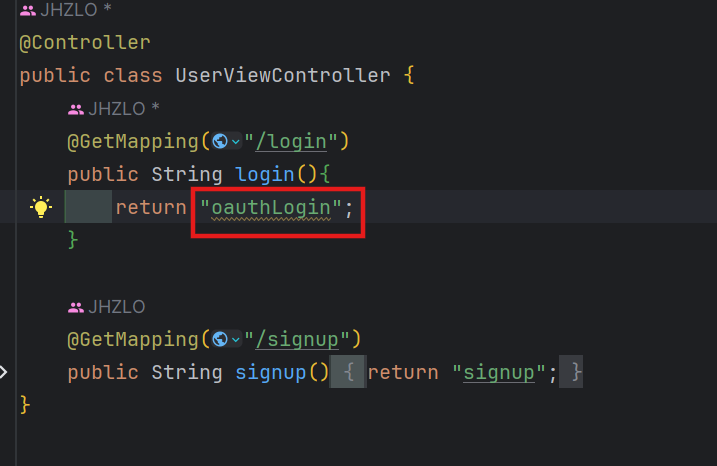
뷰를 oauthLogin으로 변경한다.
2단계 : 구글 로그인 브랜드 이미지 다운로드
https://developers.google.com/identity/branding-guidelines?hl=ko
로그인 브랜드 가이드라인 | Google ID 플랫폼 | Google for Developers
로그인 브랜드 가이드라인 컬렉션을 사용해 정리하기 내 환경설정을 기준으로 콘텐츠를 저장하고 분류하세요. 모바일 또는 웹 앱에서 기본적인 profile 또는 email 범위로 Google 로그인을 사용하고
developers.google.com

- [파일 다운로드] 버튼을 누르고 압축 해제
- "C:\Users\kjh01\Downloads\signin-assets\signin-assets\Web (mobile + desktop)\png@1x\dark\web_dark_rd_SI@1x.png" 복사한다.
3단계 : resources/static/img
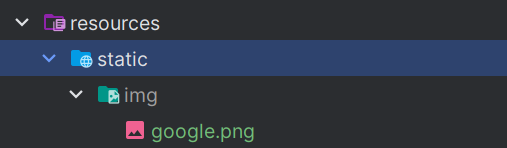
- resources/static/img 디렉터리를 만들고 복사한 파일을 붙여 넣는다.
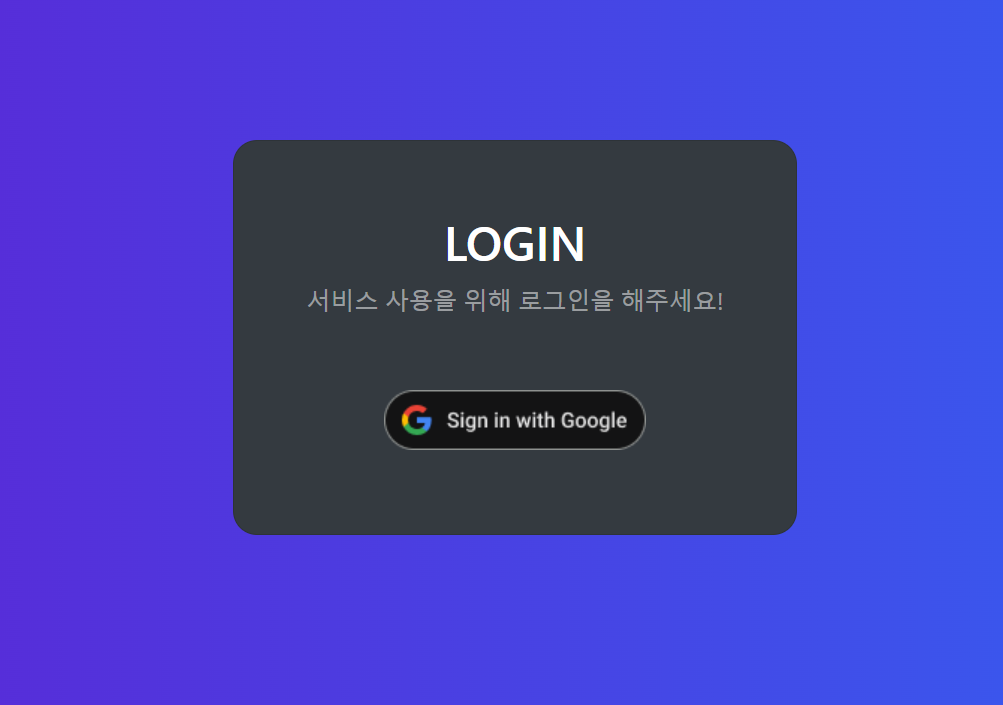
4단계 : templates/oauthLogin.html 생성
<!DOCTYPE html>
<html lang="en">
<head>
    <meta charset="UTF-8">
    <title>Title</title>
    <link rel="stylesheet" href="https://cdn.jsdelivr.net/npm/bootstrap@4.6.1/dist/css/bootstrap.min.css">

    <style>
        .gradient-custom {
            background: #6a11cb;
            background: -webkit-linear-gradient(to right, rgba(106, 17, 203, 1), rgba(37, 117, 252, 1));
            background: linear-gradient(to right, rgba(106, 17, 203, 1), rgba(37, 117, 252, 1))
        }
    </style>
</head>
<body class="gradient-custom">
<section class="d-flex vh-100">
    <div class="container-fluid row justify-content-center align-content-center">
        <div class="card bg-dark" style="border-radius: 1rem;">
            <div class="card-body p-5 text-center">
                <h2 class="text-white">LOGIN</h2>
                <p class="text-white-50 mt-2 mb-5">서비스 사용을 위해 로그인을 해주세요!</p>

                <div class = "mb-2">
                    <a href="/oauth2/authorization/google">
                        <img src="/img/google.png">
                    </a>
                </div>
            </div>
        </div>
    </div>
</section>
</body>
</html>
위의 구글 이미지를 활용해서 로그인 화면에 OAuth 연결 버튼을 생성한다.
5단계 : resources/js/token.js 생성
const token = searchParam('token')

if (token) {
    localStorage.setItem("access_token", token)
}

function searchParam(key) {
    return new URLSearchParams(location.search).get(key);
}
파라미터로 받은 토큰이 있다면 토큰을 로컬 스토리지에 저장한다.
6단계 : articleList.html 수정 -> token.js 가져오기
-- 생략 --

<script src="/js/token.js"></script>
<script src="/js/article.js"></script>
</body>
token.js를 가져올 수 있도록 파일을 수정한다.
7단계 : article.js 수정 -> 토큰 기반 요청 사용
// 생성 기능
const createButton = document.getElementById('create-btn');

if (createButton) {
    // 등록 버튼을 클릭하면 /api/articles로 요청을 보낸다
    createButton.addEventListener('click', event => {
        body = JSON.stringify({
            title: document.getElementById('title').value,
            content: document.getElementById('content').value
        });
        function success() {
            alert('등록 완료되었습니다.');
            location.replace('/articles');
        };
        function fail() {
            alert('등록 실패했습니다.');
            location.replace('/articles');
        };

        httpRequest('POST','/api/articles', body, success, fail)
    });
}


// 쿠키를 가져오는 함수
function getCookie(key) {
    var result = null;
    var cookie = document.cookie.split(';');
    cookie.some(function (item) {
        item = item.replace(' ', '');

        var dic = item.split('=');

        if (key === dic[0]) {
            result = dic[1];
            return true;
        }
    });

    return result;
}

// HTTP 요청을 보내는 함수
function httpRequest(method, url, body, success, fail) {
    fetch(url, {
        method: method,
        headers: { // 로컬 스토리지에서 액세스 토큰 값을 가져와 헤더에 추가
            Authorization: 'Bearer ' + localStorage.getItem('access_token'),
            'Content-Type': 'application/json',
        },
        body: body,
    }).then(response => {
        if (response.status === 200 || response.status === 201) {
            return success();
        }
        const refresh_token = getCookie('refresh_token');
        if (response.status === 401 && refresh_token) {
            fetch('/api/token', {
                method: 'POST',
                headers: {
                    Authorization: 'Bearer ' + localStorage.getItem('access_token'),
                    'Content-Type': 'application/json',
                },
                body: JSON.stringify({
                    refreshToken: getCookie('refresh_token'),
                }),
            })
                .then(res => {
                    if (res.ok) {
                        return res.json();
                    }
                })
                .then(result => { // 재발급이 성공하면 로컬 스토리지값을 새로운 액세스 토큰으로 교체
                    localStorage.setItem('access_token', result.accessToken);
                    httpRequest(method, url, body, success, fail);
                })
                .catch(error => fail());
        } else {
            return fail();
        }
    });
}
- 기존 createButton관련 코드를 위와 같이 수정한다.
- POST 요청을 보낼 때 액세스 토큰도 함께 보낸다.
응답에 권한이 없다는 에러 코드가 발생하면 리프레시 토큰과 함께 새로운 액세스 토큰을 요청하고, 전달받은 액세스 토큰으로 다시 API 요청
8단계 : article.js 수정 -> 삭제, 수정 httpRequest() 함수 사용
// 삭제 기능
const deleteButton = document.getElementById('delete-btn');

if (deleteButton) {
    deleteButton.addEventListener('click', event => {
        let id = document.getElementById('article-id').value;
        function success() {
            alert('삭제가 완료되었습니다.');
            location.replace('/articles');
        }

        function fail() {
            alert('삭제 실패했습니다.');
            location.replace('/articles');
        }

        httpRequest('DELETE',`/api/articles/${id}`, null, success, fail);
    });
}

// 수정 기능
const modifyButton = document.getElementById('modify-btn');

if (modifyButton) {
    modifyButton.addEventListener('click', event => {
        let params = new URLSearchParams(location.search);
        let id = params.get('id');

        body = JSON.stringify({
            title: document.getElementById('title').value,
            content: document.getElementById('content').value
        })

        function success() {
            alert('수정 완료되었습니다.');
            location.replace(`/articles/${id}`);
        }

        function fail() {
            alert('수정 실패했습니다.');
            location.replace(`/articles/${id}`);
        }

        httpRequest('PUT',`/api/articles/${id}`, body, success, fail);
    });
}
- 삭제, 수정 기능도 만들어 둔 httpRequest() 함수를 사용하도록 코드를 사용한다.
□ 글 수정, 삭제, 글쓴이 확인 로직 추가하기
글을 수정하거나 삭제할 때 요청 헤더에 토큰을 전달하므로 사용자 자신이 작성한 글인지 검증할 수 있다.
따라서 본인 글이 아닌데 수정 삭제를 시도하는 경우에 예외를 발생시키도록 코드를 수정한다.
BlogService.java
@RequiredArgsConstructor // final이 붙거나 @NotNull이 붙은 필드의 생성자 추가
@Service // 빈으로 등록
public class BlogService {

    private final BlogRepository blogRepository;

    --- 생략 ---

    public void delete(long id) {
        Article article = blogRepository.findById(id)
                .orElseThrow(() -> new IllegalArgumentException("not found : " + id));

        authorizeArticleAuthor(article);
        blogRepository.delete(article);
    }

    @Transactional
    public Article update(long id, UpdateArticleRequest request) {
        Article article = blogRepository.findById(id)
                .orElseThrow(() -> new IllegalArgumentException("not found : " + id));

        authorizeArticleAuthor(article);
        article.update(request.getTitle(), request.getContent());

        return article;
    }

    // 게시글을 작성한 유저인지 확인
    private static void authorizeArticleAuthor(Article article) {
        String userName = SecurityContextHolder.getContext().getAuthentication().getName();
        if (!article.getAuthor().equals(userName)) {
            throw new IllegalArgumentException("not authorized");
        }
    }
}
수정, 삭제 메서드는 작업을 수행하기 전 authorizeArticleAuthor() 메서드를 실행해
현재 인증 객체에 담겨 있는 사용자의 정보와 글을 작성한 사용자의 정보를 비교한다.
만약 서로 다르면 예외를 발생시켜 작업을 수행하지 않는다.
3. OAuth2 실행 테스트하기
1단계 : [스프링부트 애플리케이션 실행] → [localhost:8080/login 접속]
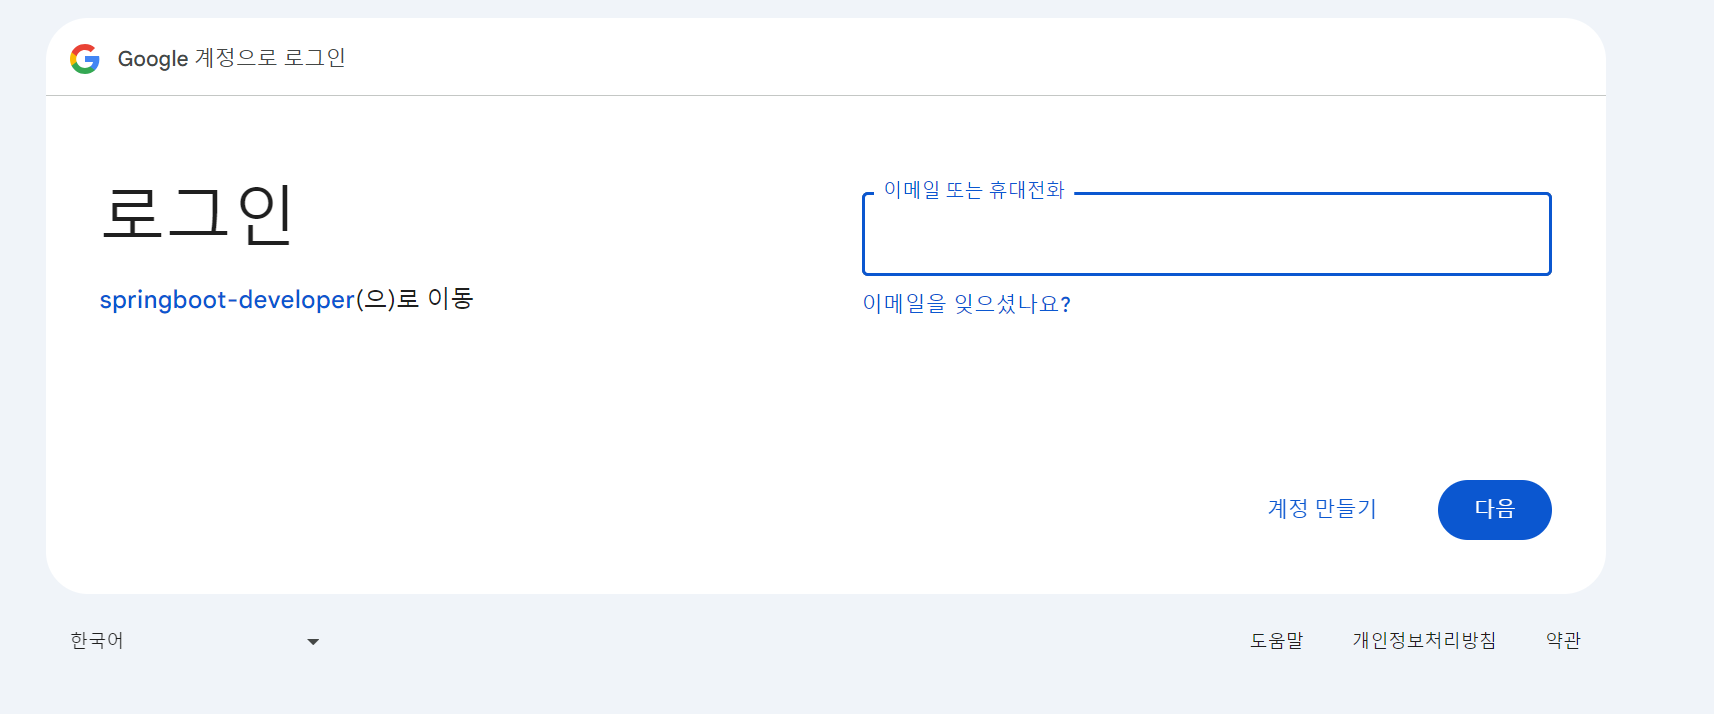
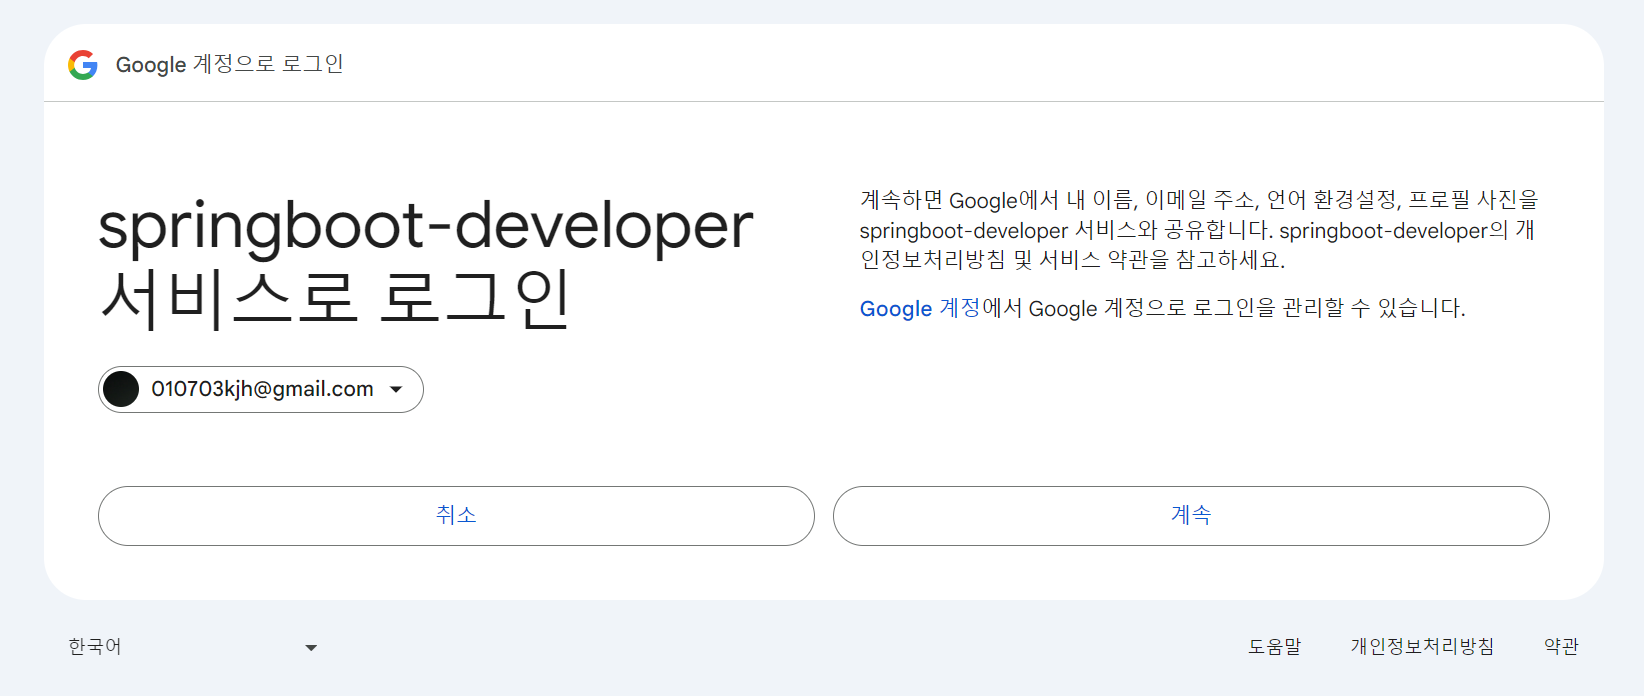
위와 같은 과정을 거치면 google 계정을 통해 로그인을 할 수 있다.
-> OAuth2를 이용해 로그인하는 것이다.
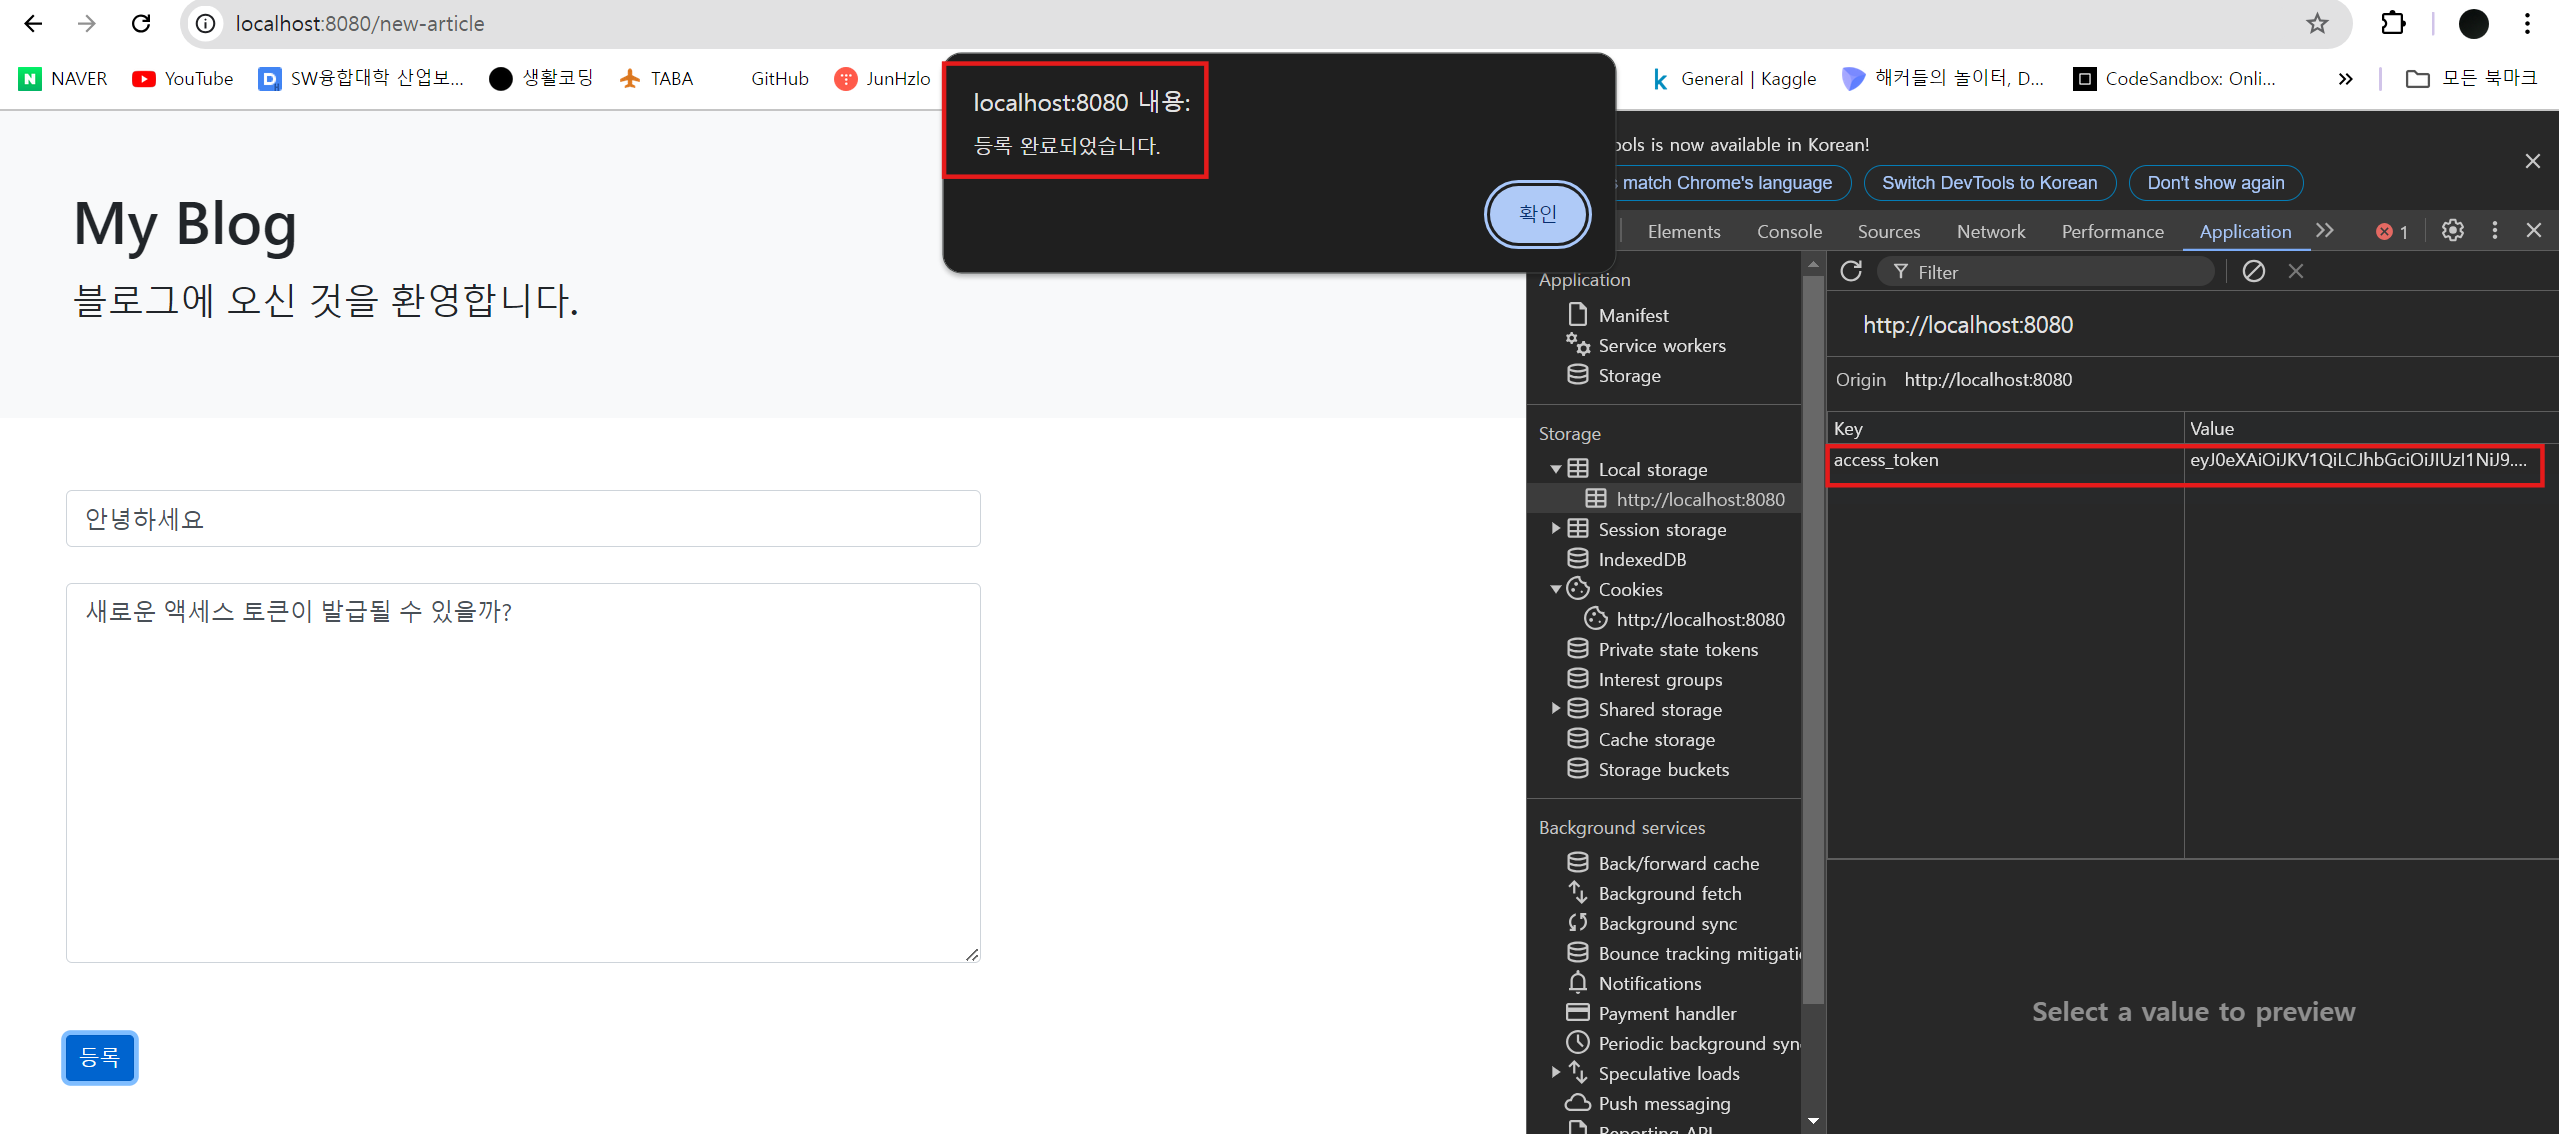
2단계 : [도구 더 보기] → [개발자 도구]
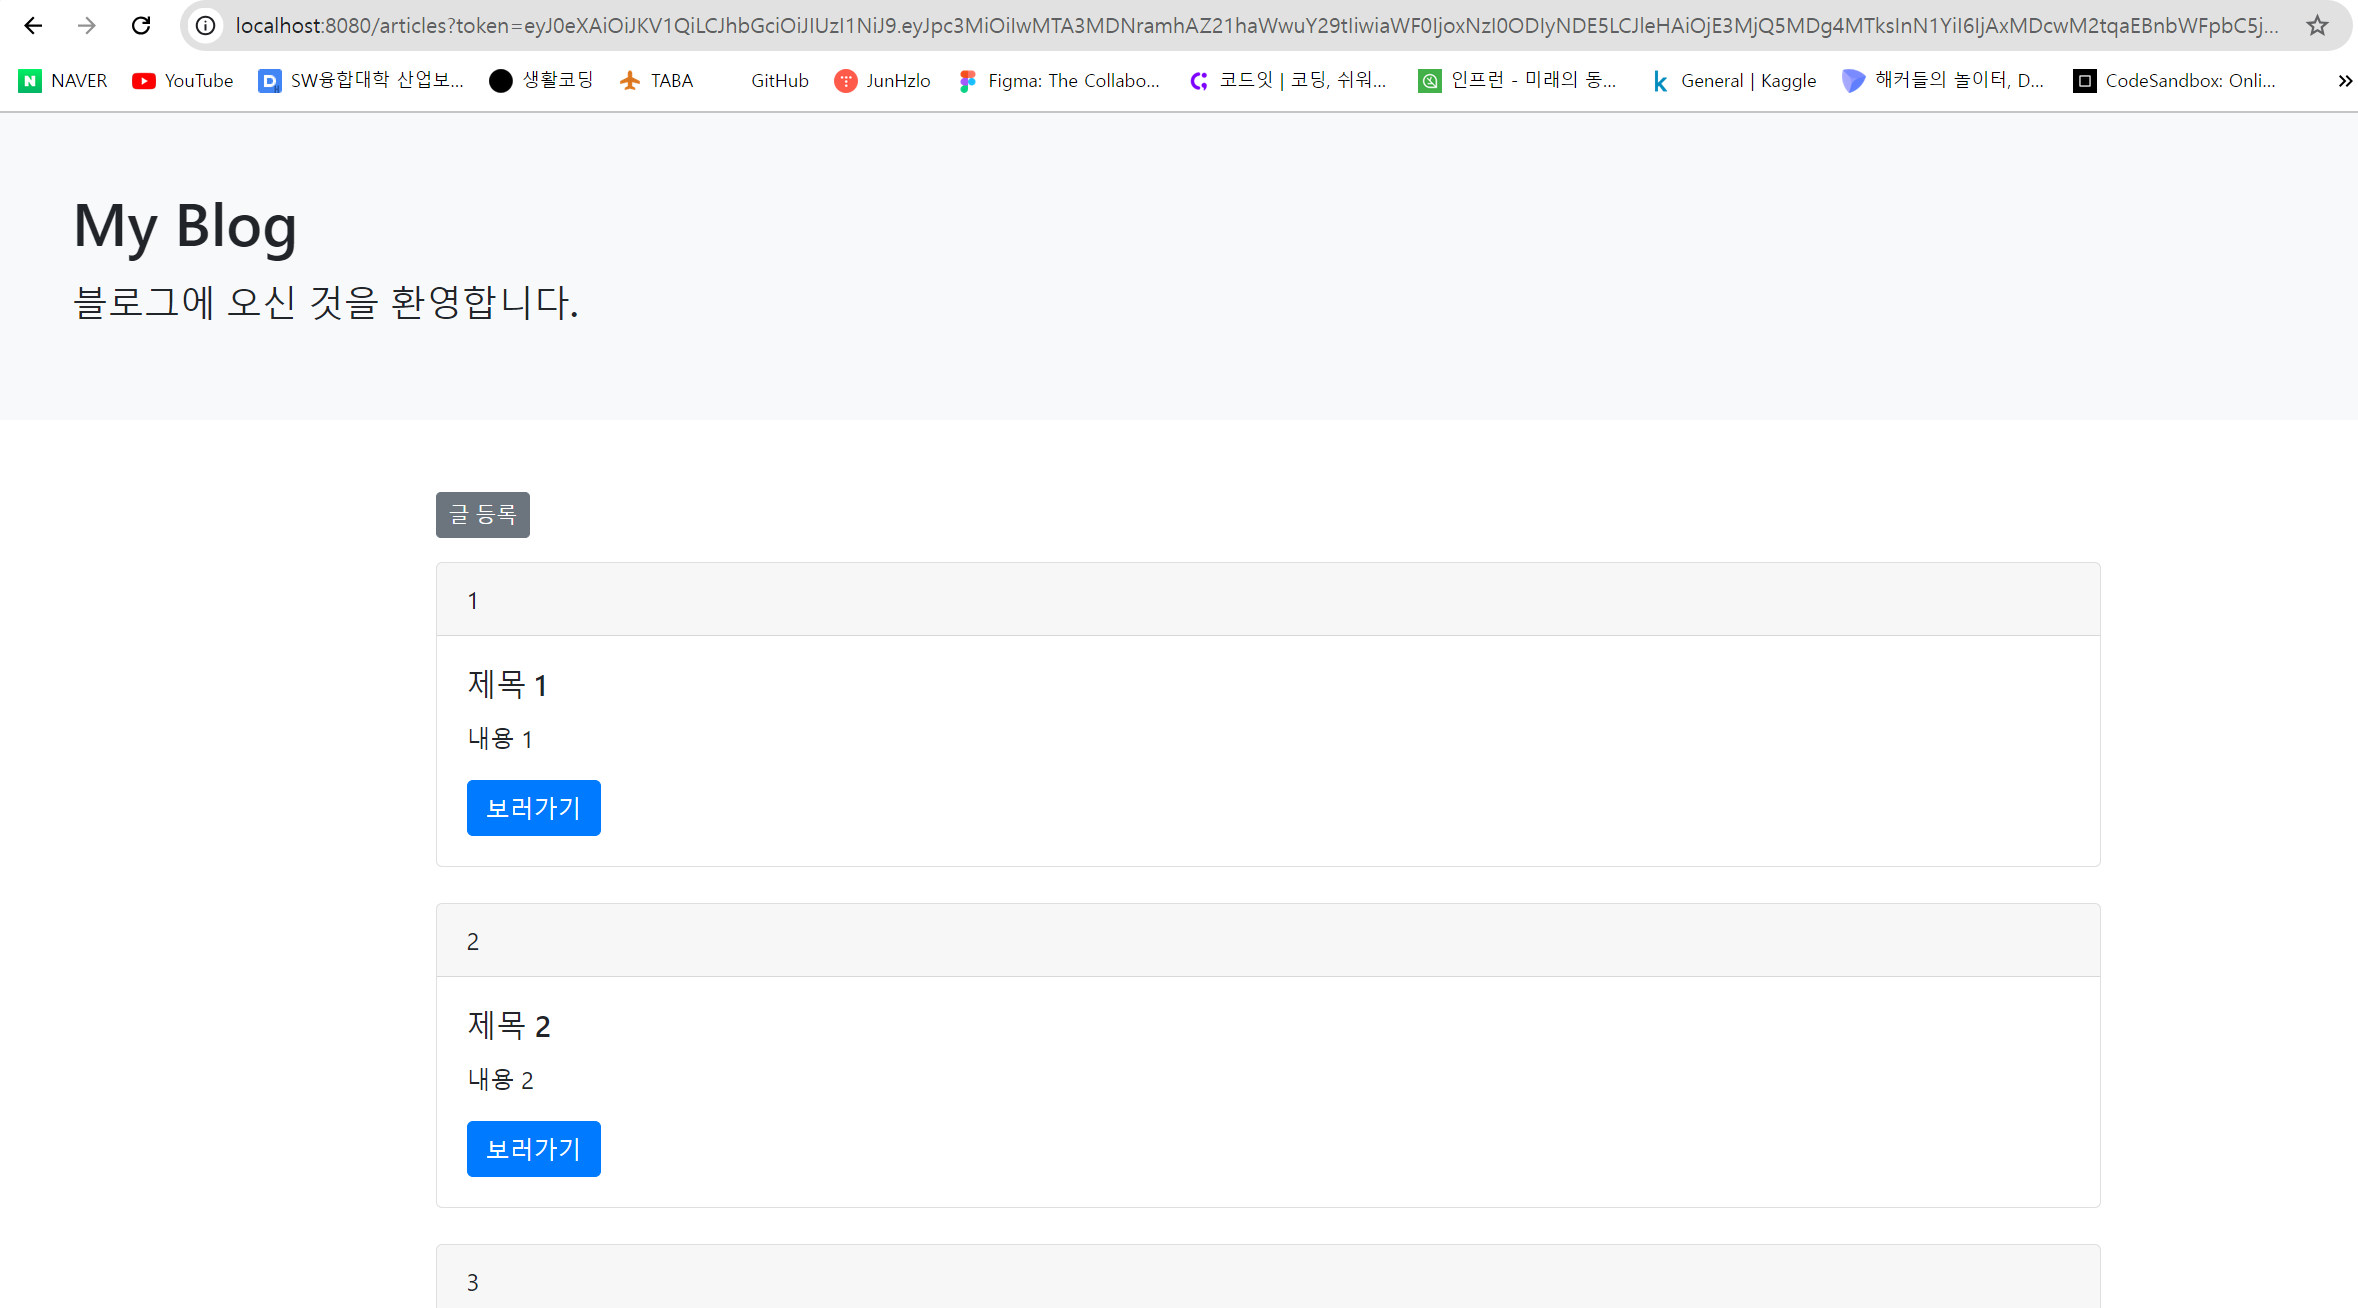
로그인이 완료되면 위와 같이 /articles로 리다이렉트 되고,
쿼리 파라미터에 token, 액세스 토큰을 요청 헤더로 전달한다.
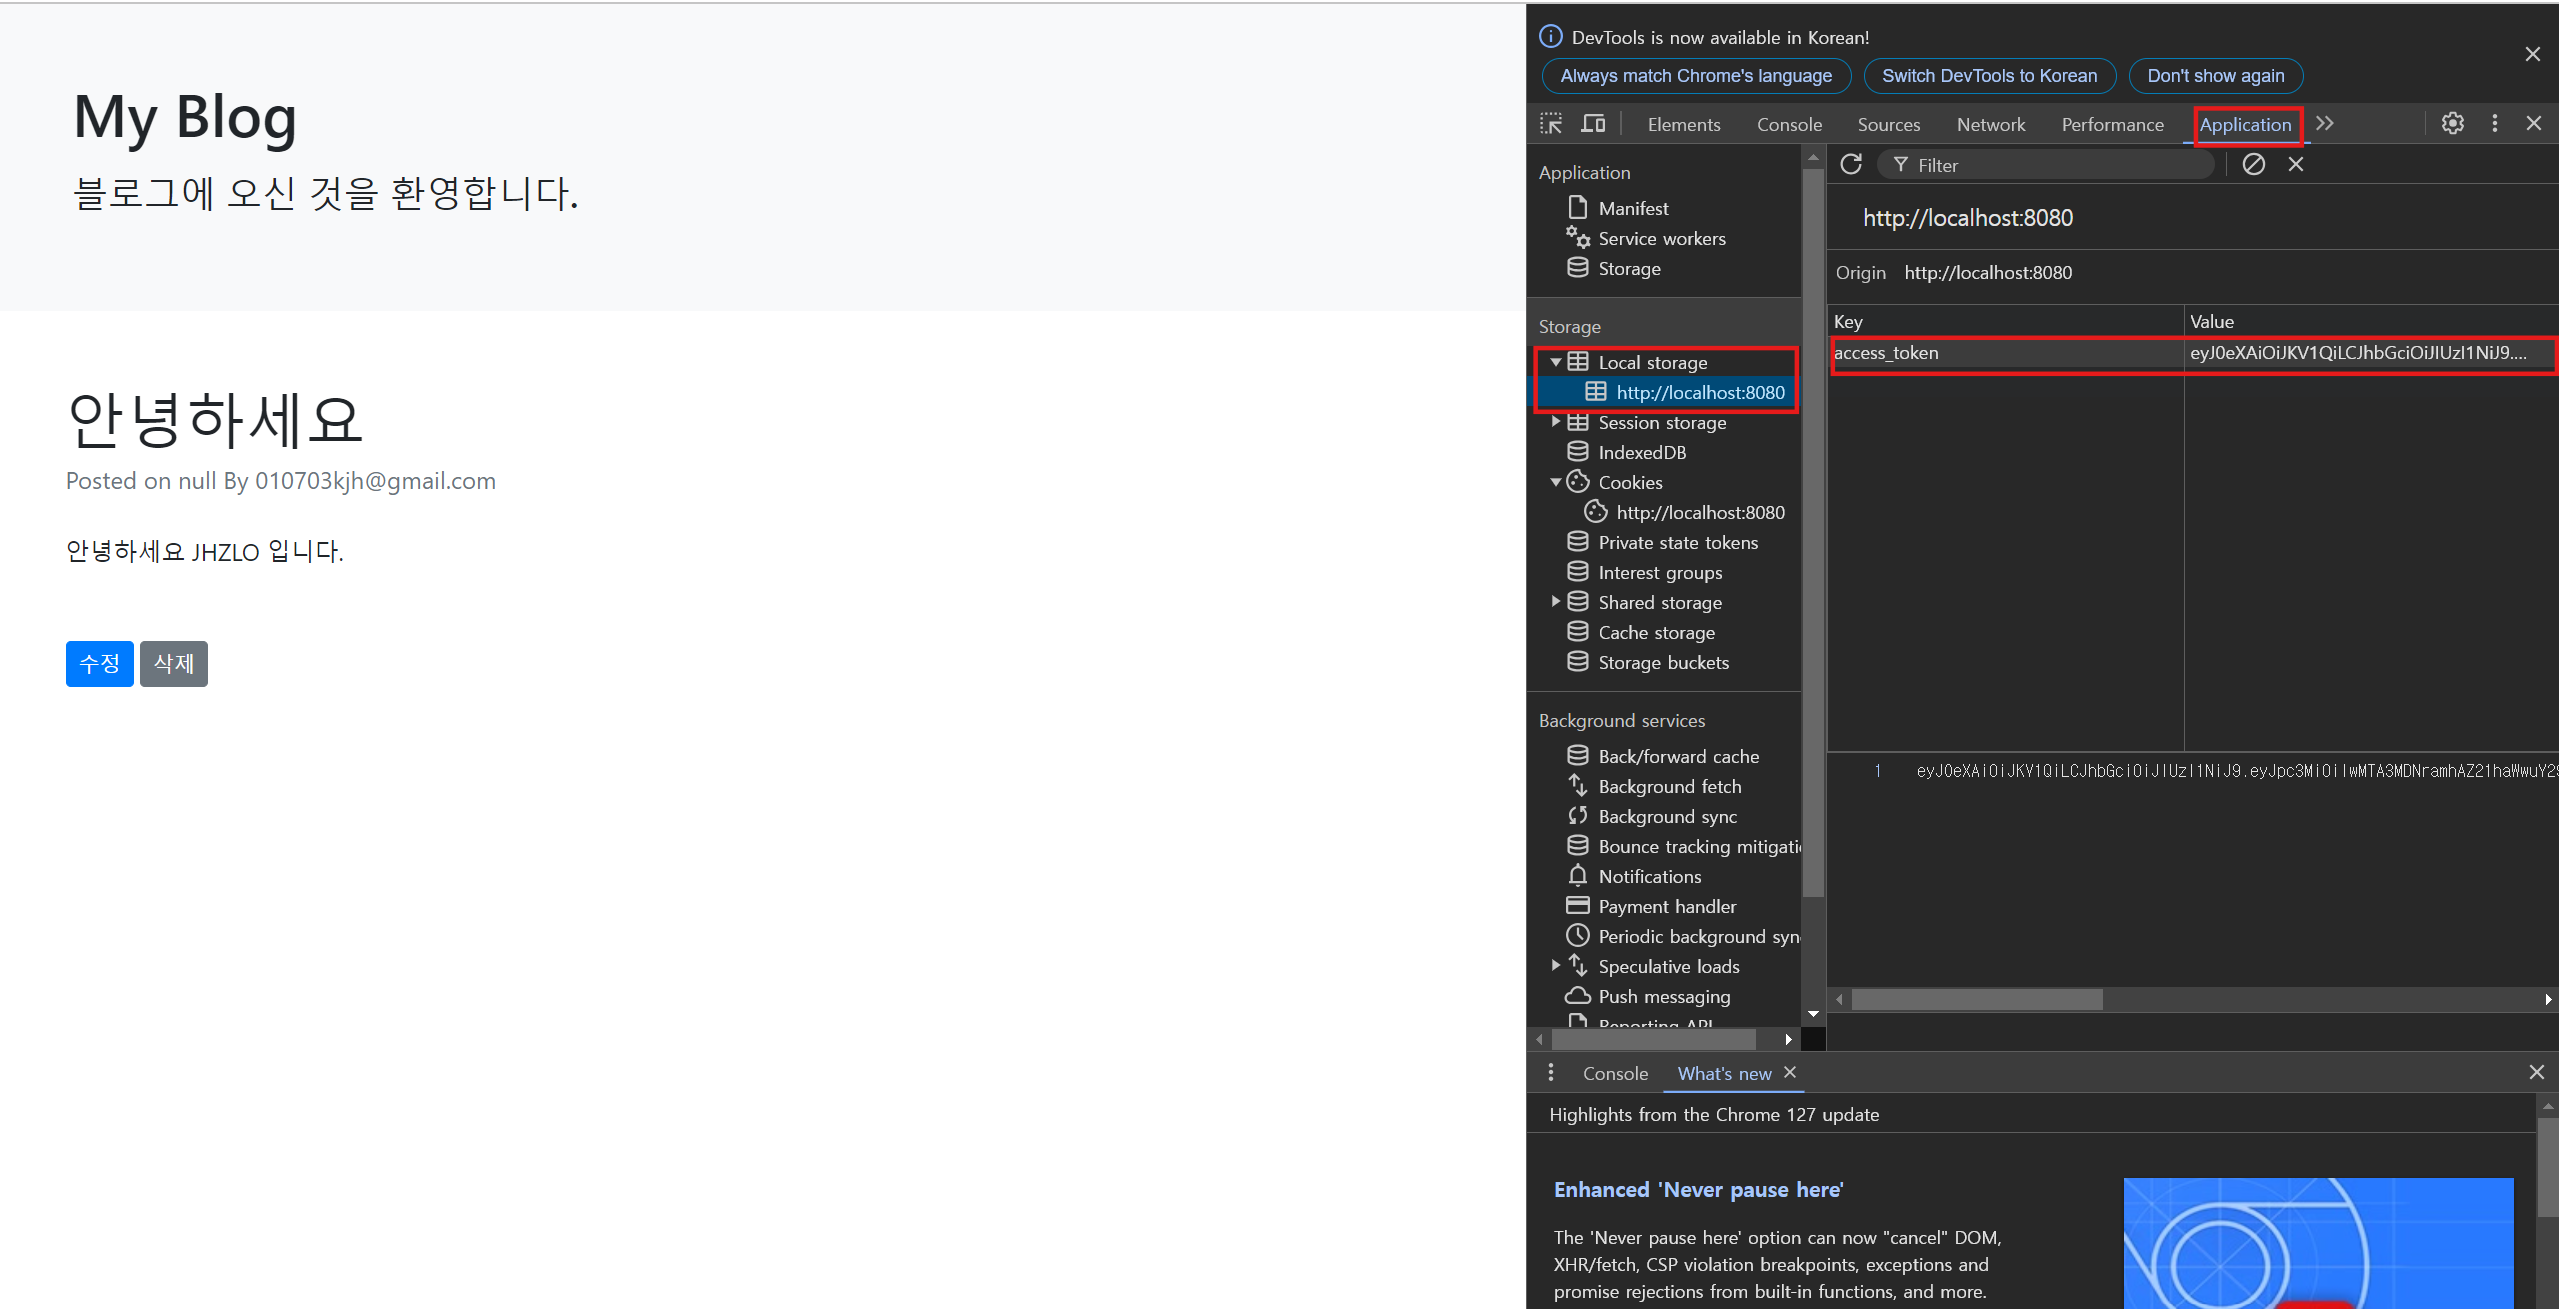
[F12] 버튼을 눌러서 [개발자 도구]의 [Local Storage]를 클릭하면 위와 같이
스프링 부트 애플리케이션으로부터 전달받은 액세스 토큰을 저장한다는 것을 확인할 수 있다.
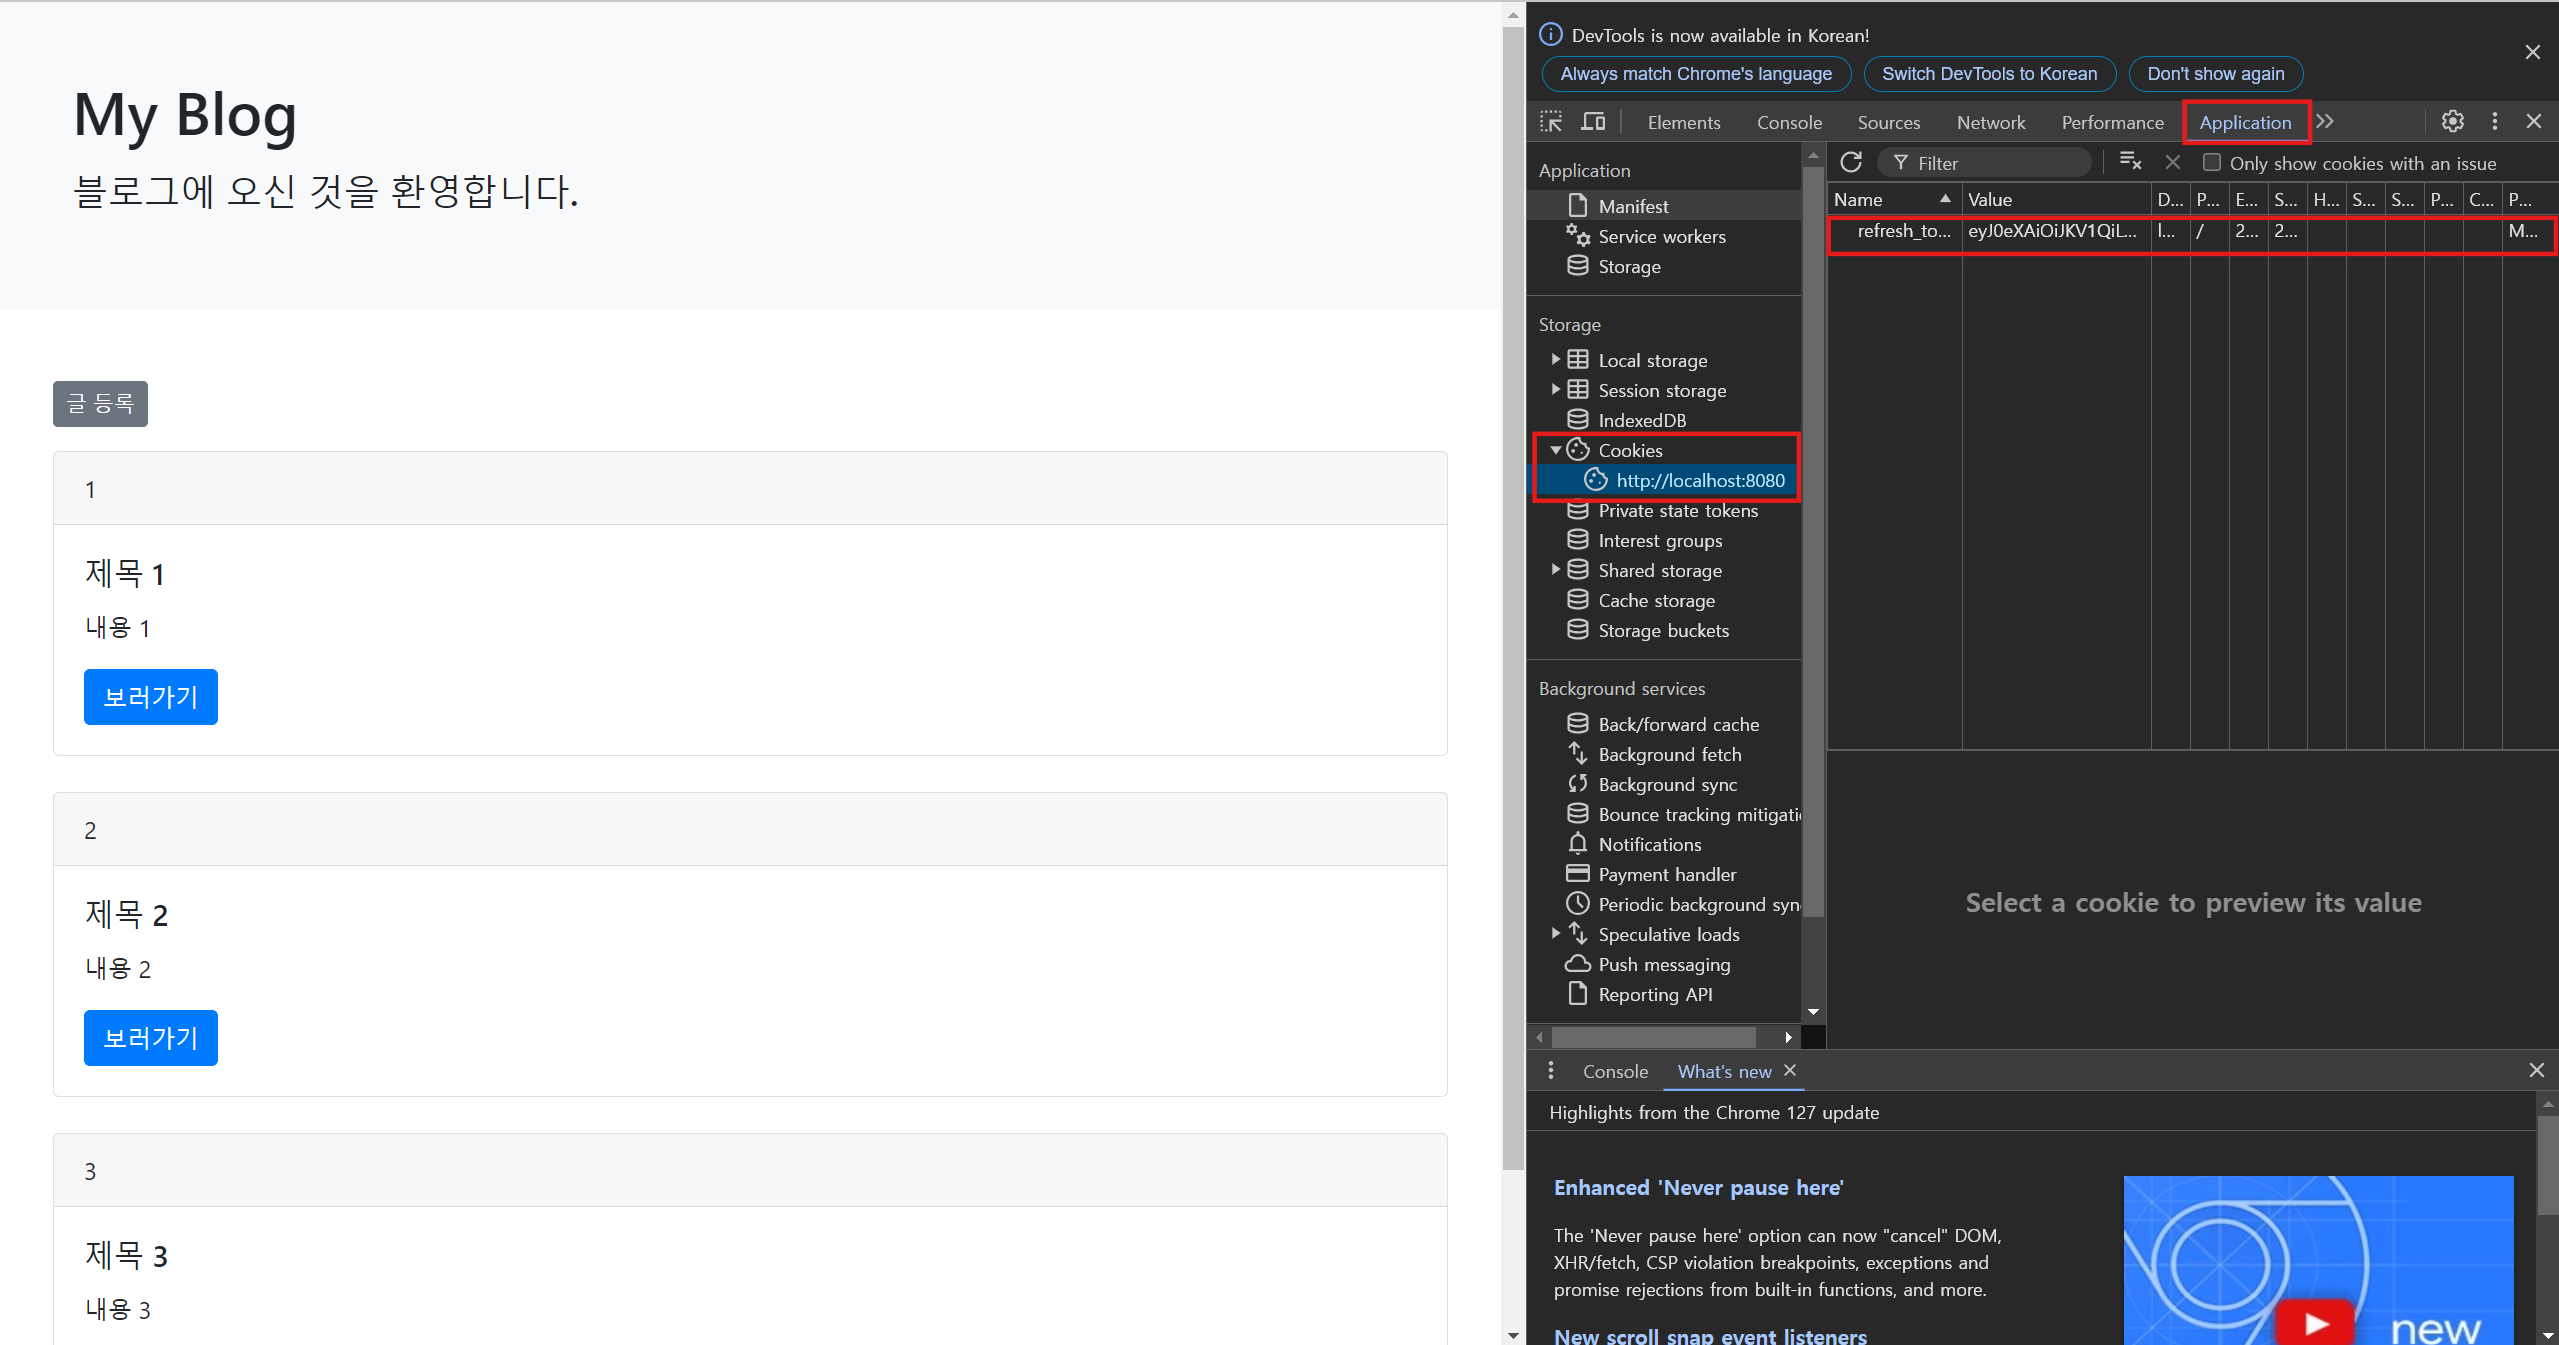
리프레시 토큰도 쿠키에 잘 저장되어 있음을 확인할 수 있다.
3단계 : [글 등록] → 액세스 토큰 만료 & 삭제
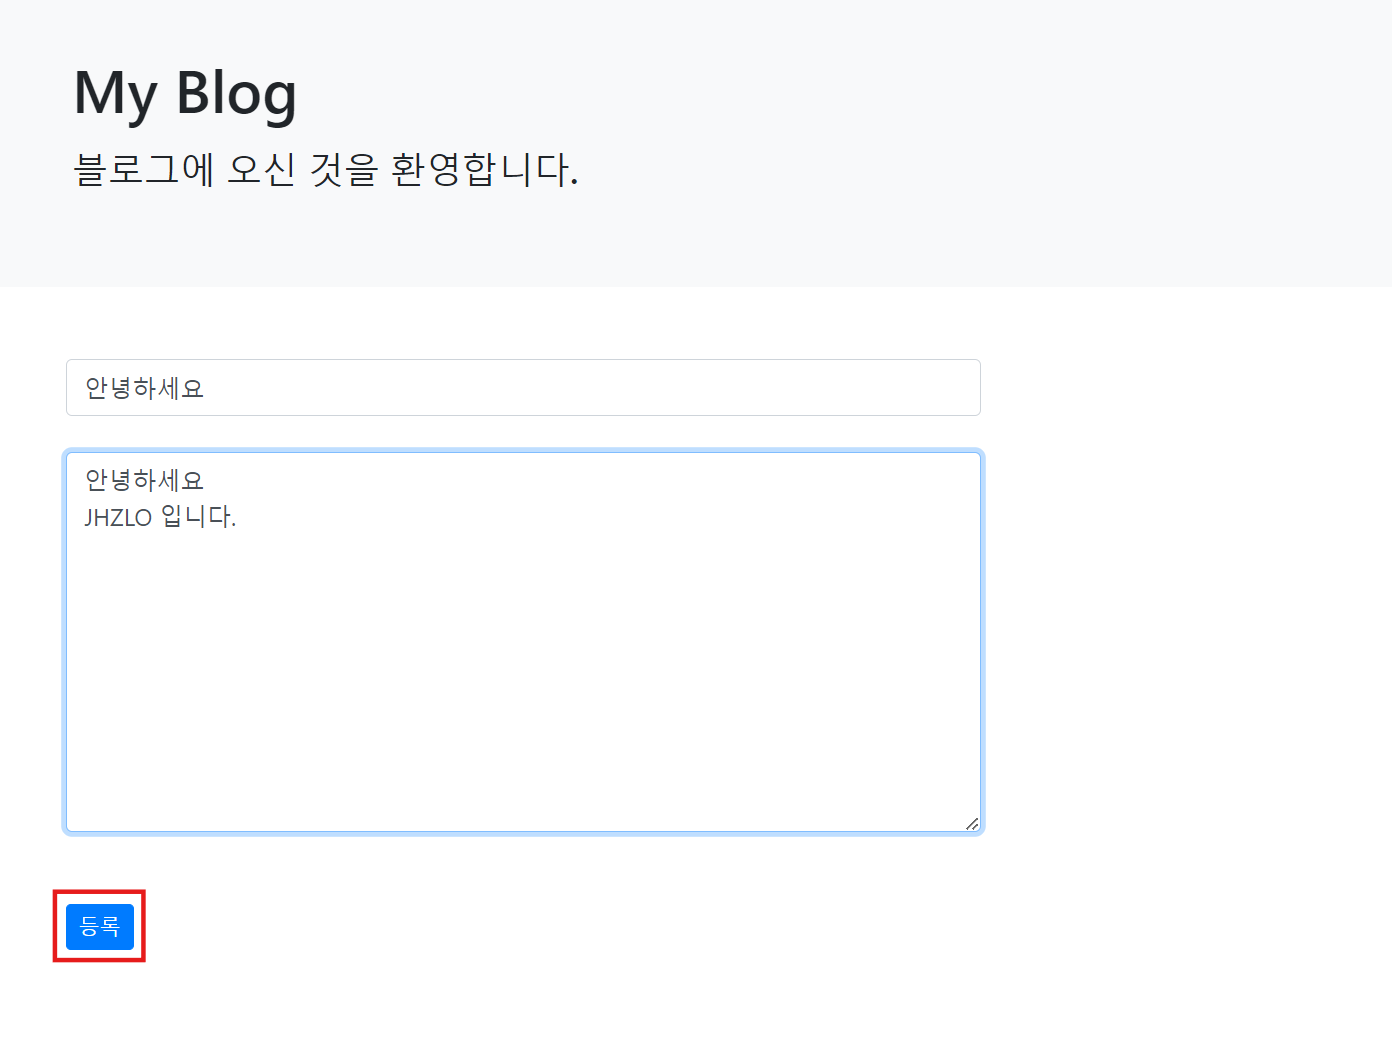
글을 등록하면 해당 글이 잘 등록되는 것을 확인할 수 있다.
(액세스 토큰이 유효하므로 인증 필터를 통과한다는 것이다.)
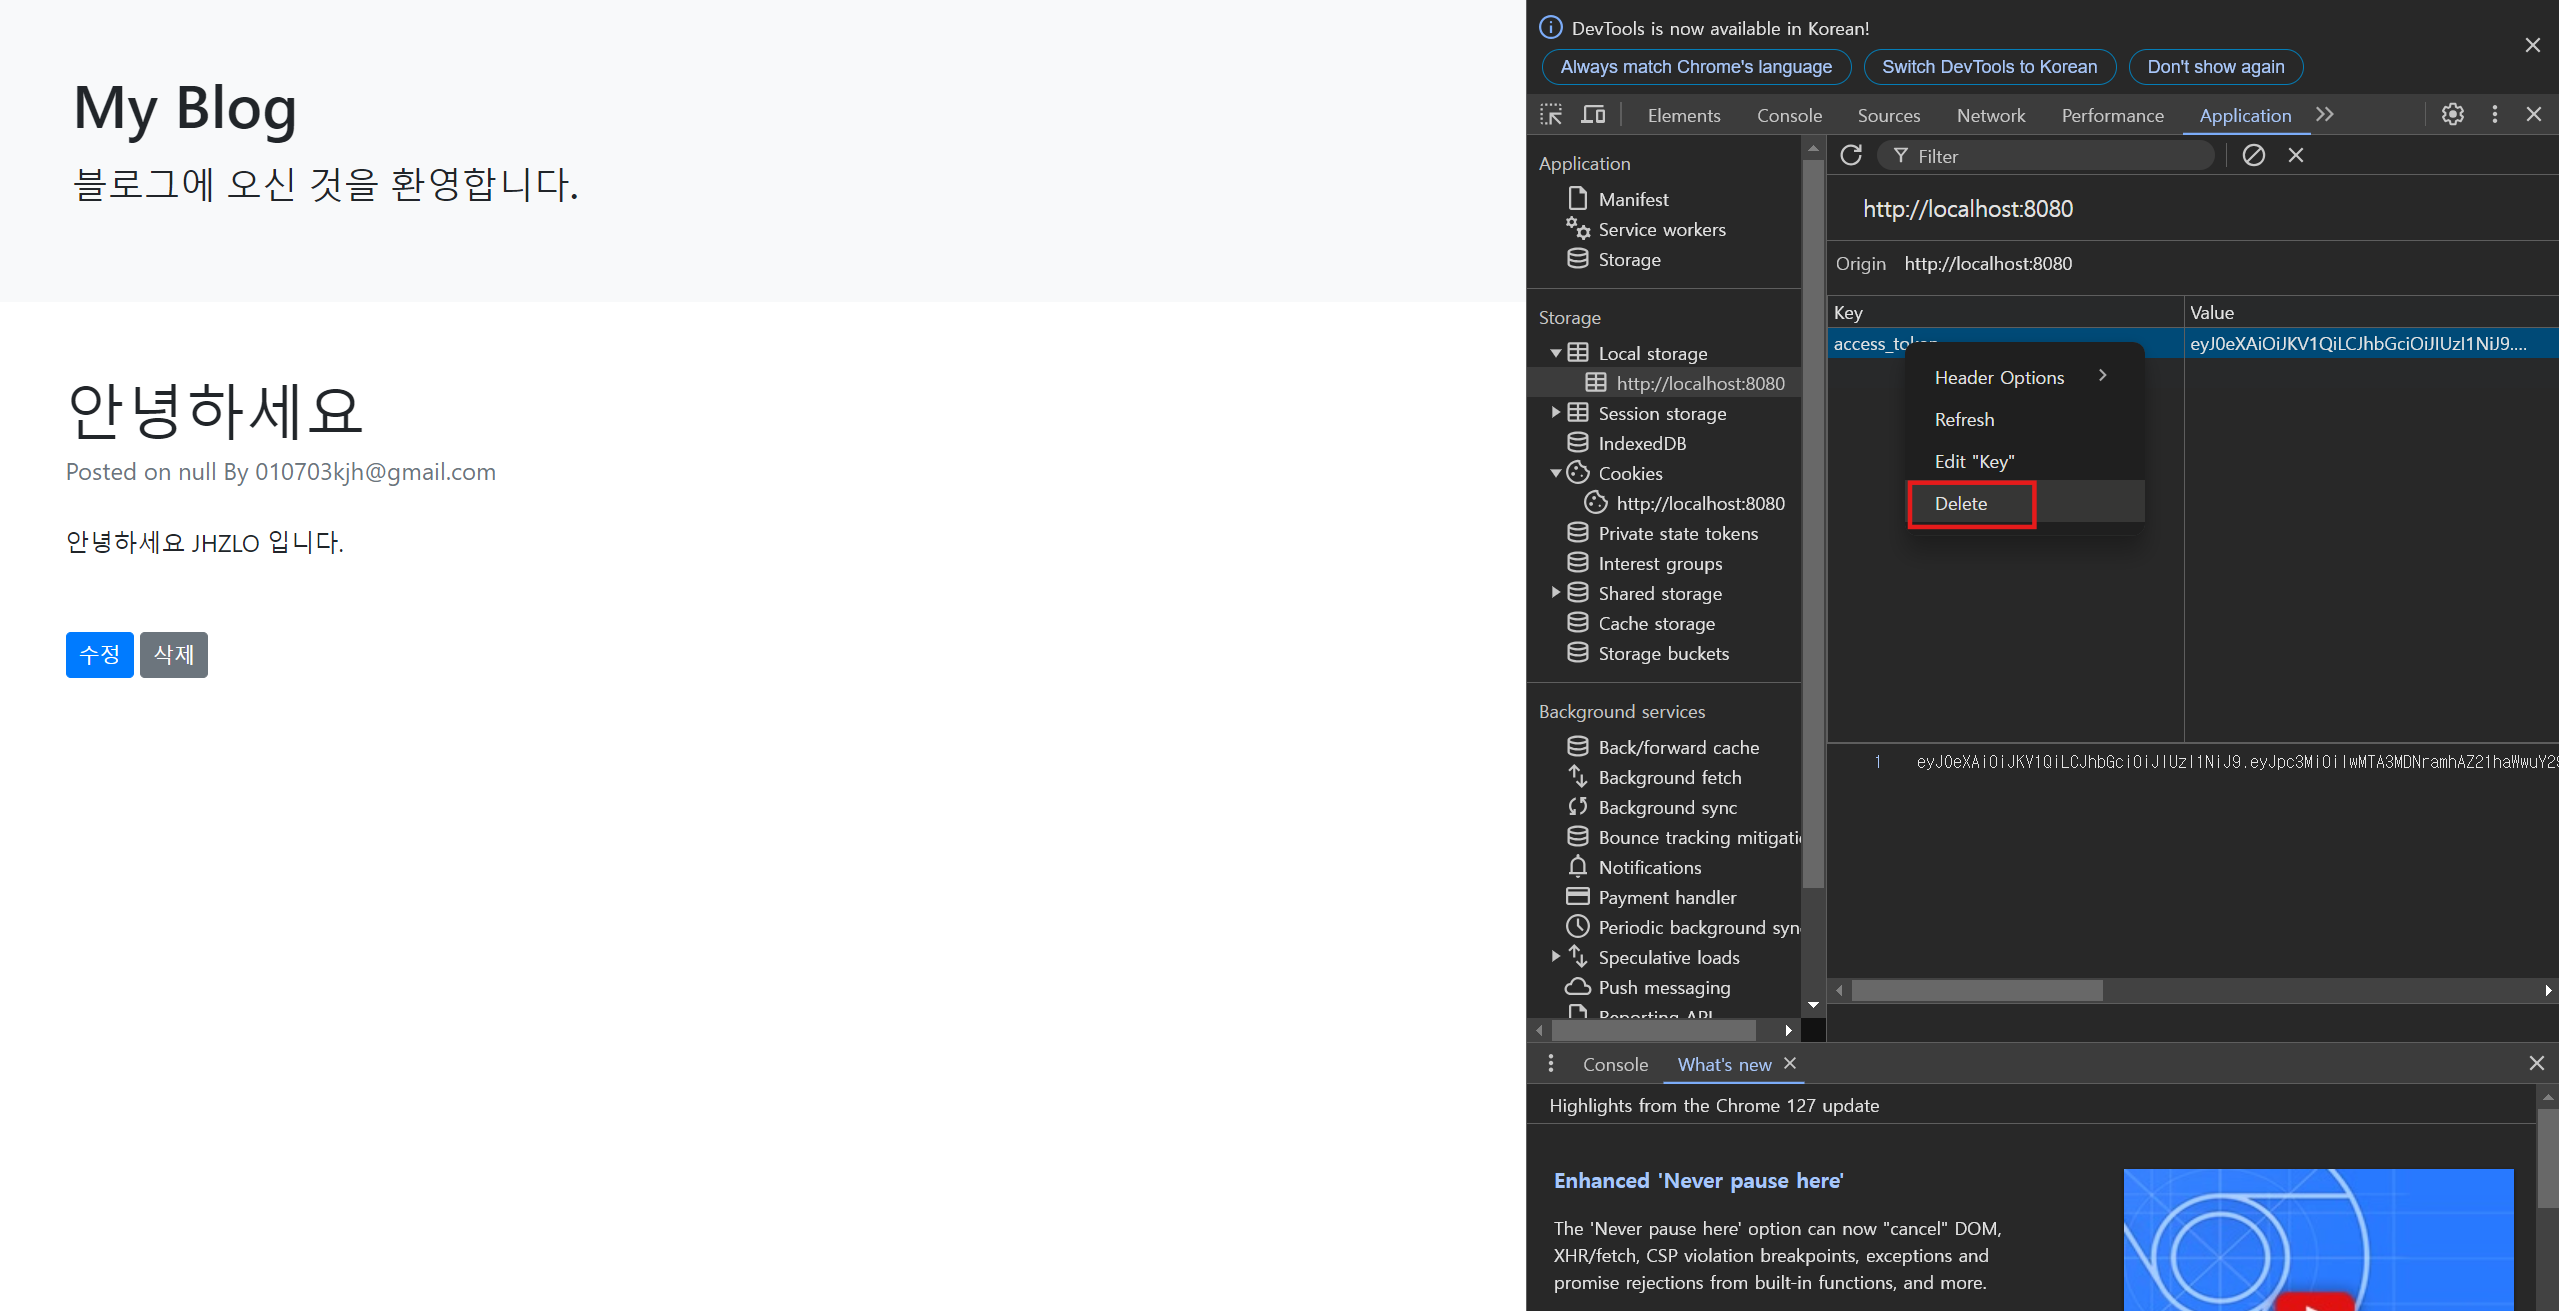
만약 해당 액세스 토큰이 만료되거나 삭제된다면 어떻게 될까?
이론상으로는 액세스 토큰이 만료되거나 삭제된다면
쿠키에 있는 리프레시 토큰이 /token API를 호출해 새 액세스 토큰을 발급받을 것이다.
한번 확인해보자.
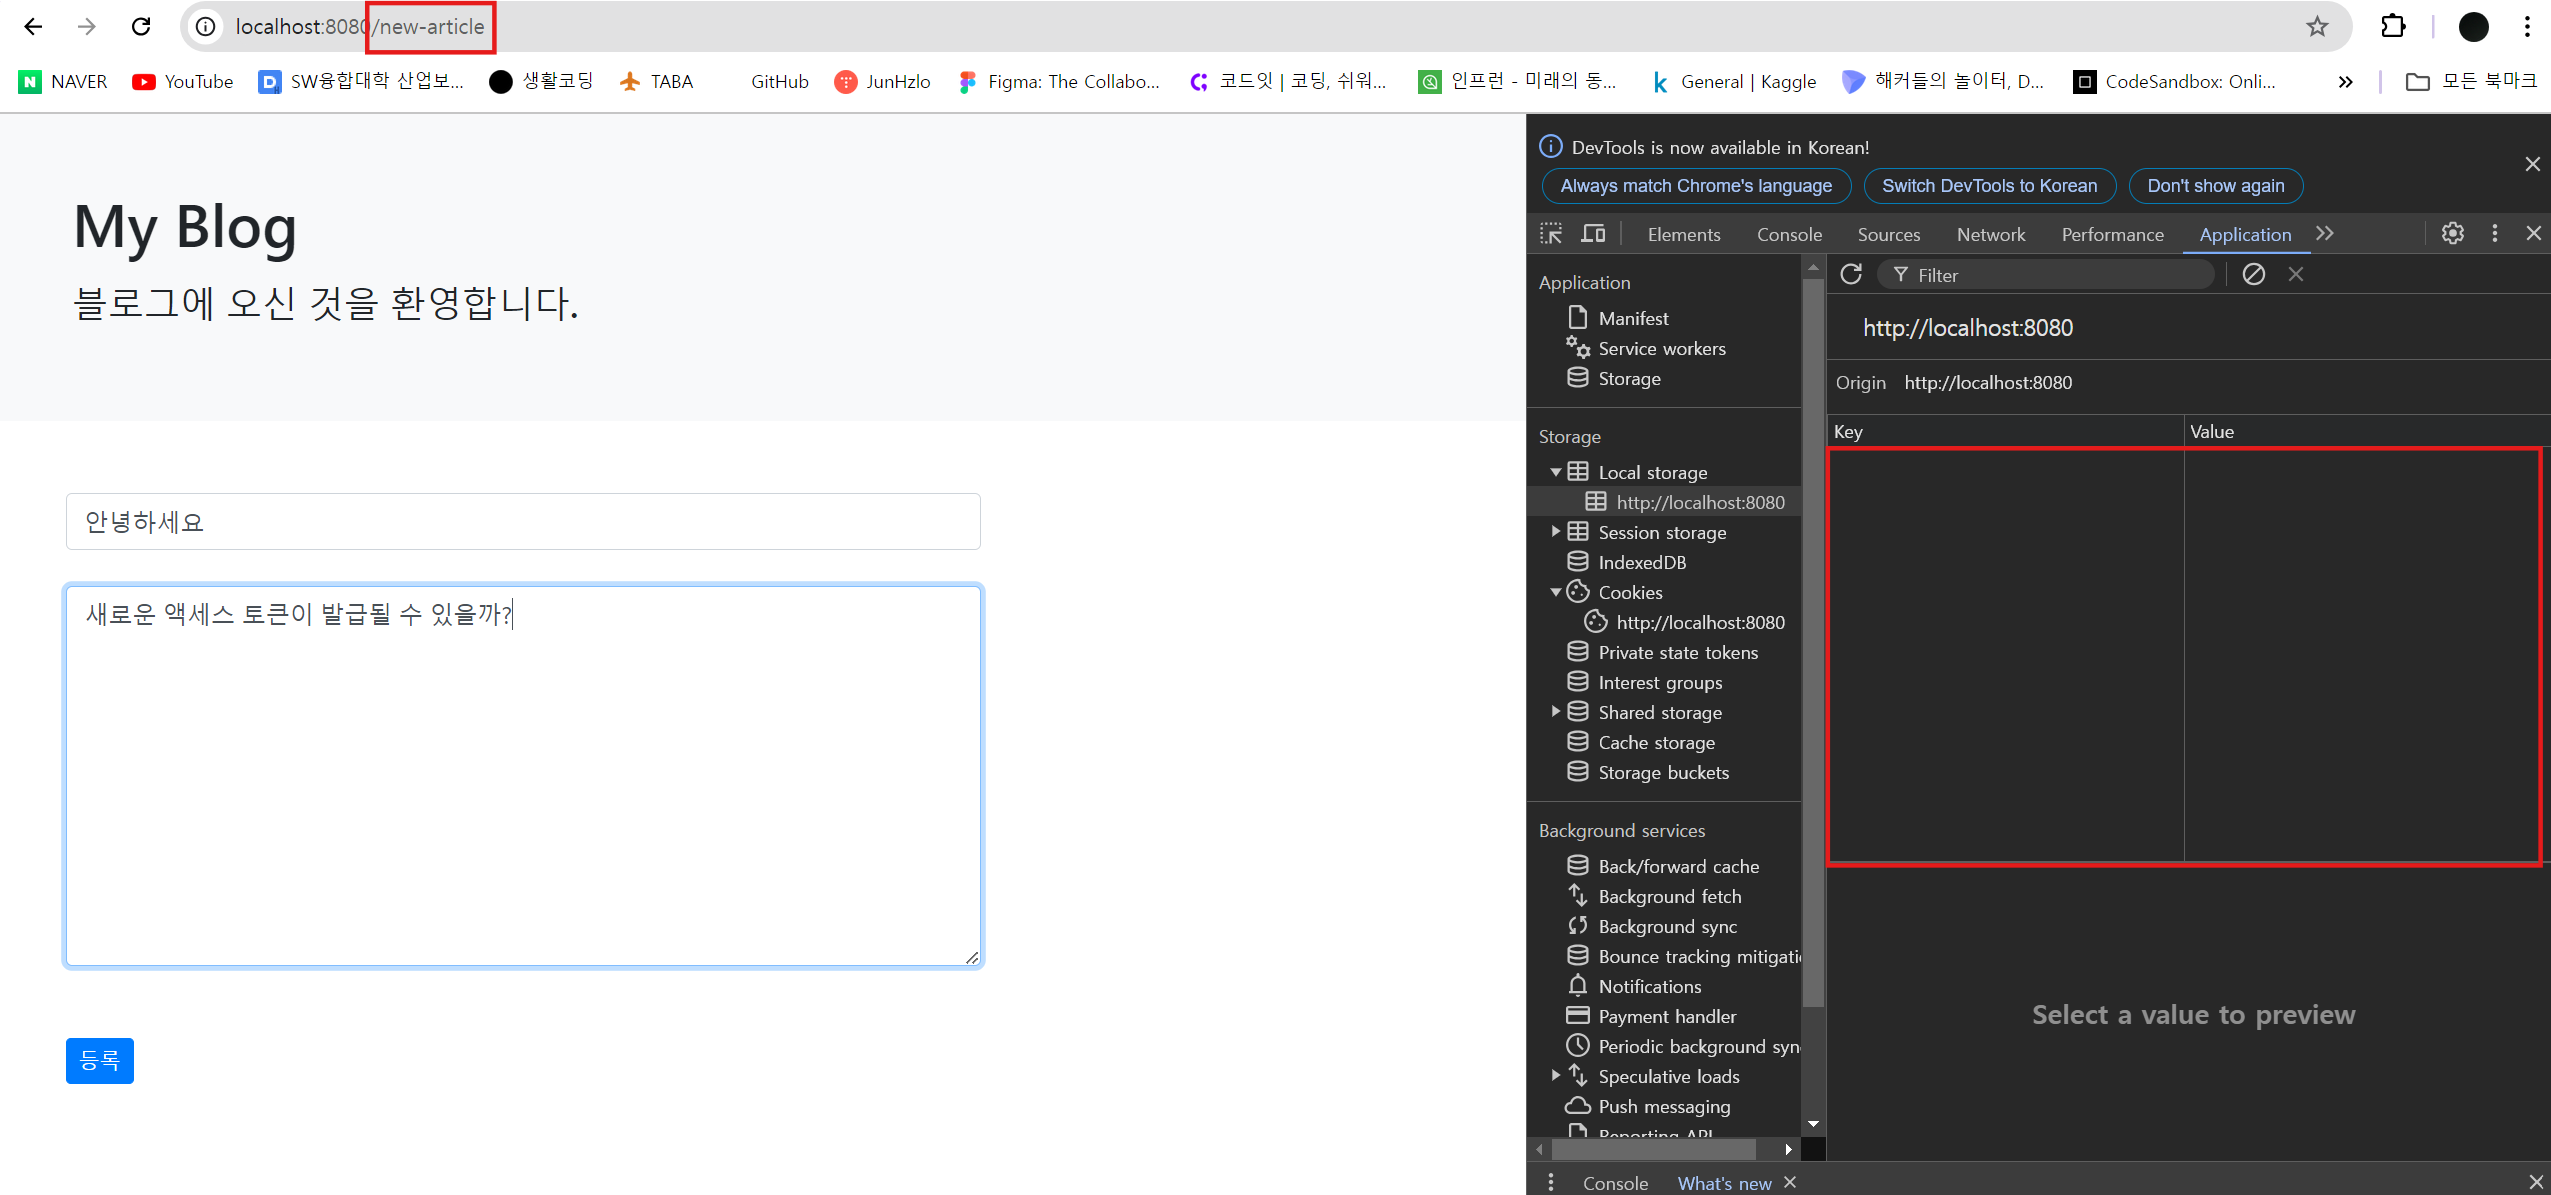
위와 같이 /new-article로 이동 후 글 등록을 시도하게 되면,
액세스 토큰을 발급받아 인증을 다시 요청해 인증 필터를 통과해 글이 잘 등록되는 것을 확인할 수 있다.
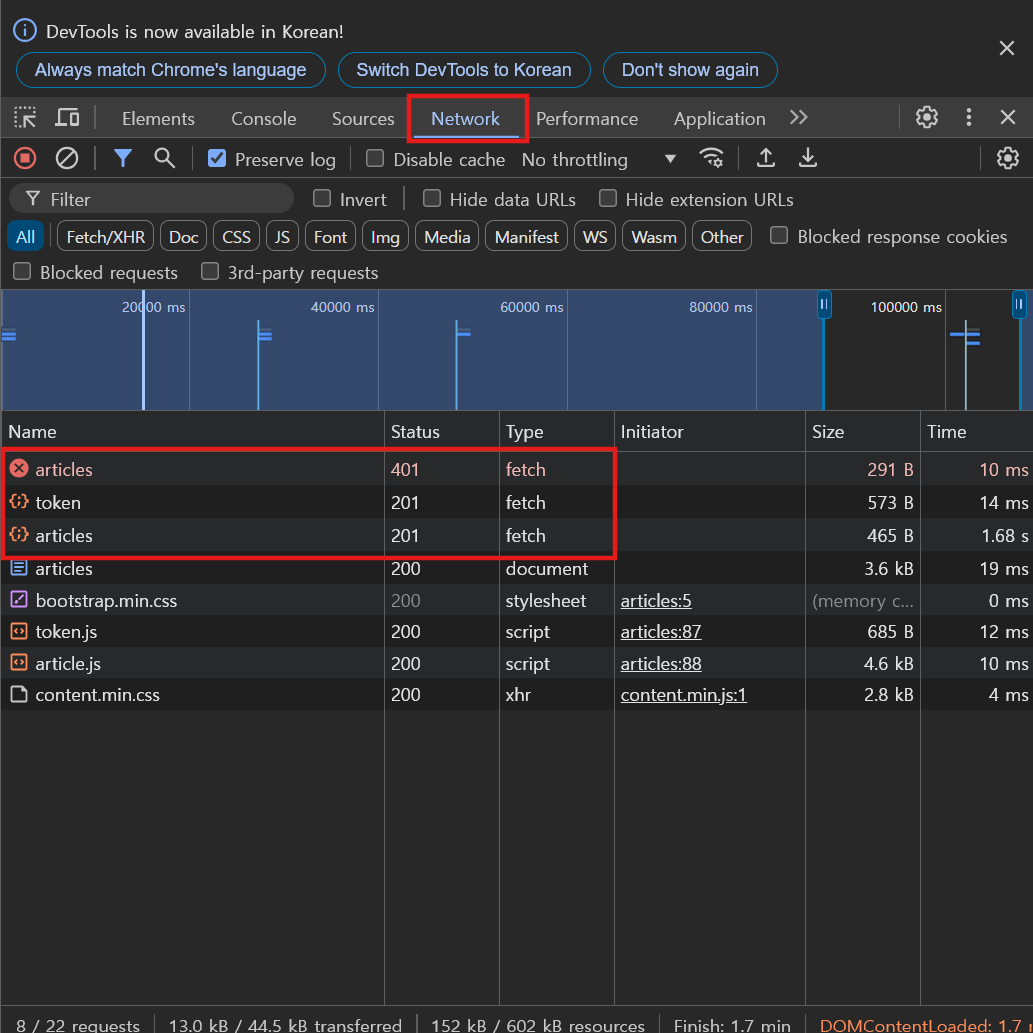
[개발자 도구]의 [network] 탭으로 들어와서 확인하면,
위와 같이 처음에는 액세스 토큰이 없어서 articles 접근이 실패했지만,
다시 액세스 토큰을 발급받아 인증 요청을 하는 과정을 살펴볼 수 있다.
3단계 : 내가 작성하지 않은 글 수정 & 삭제
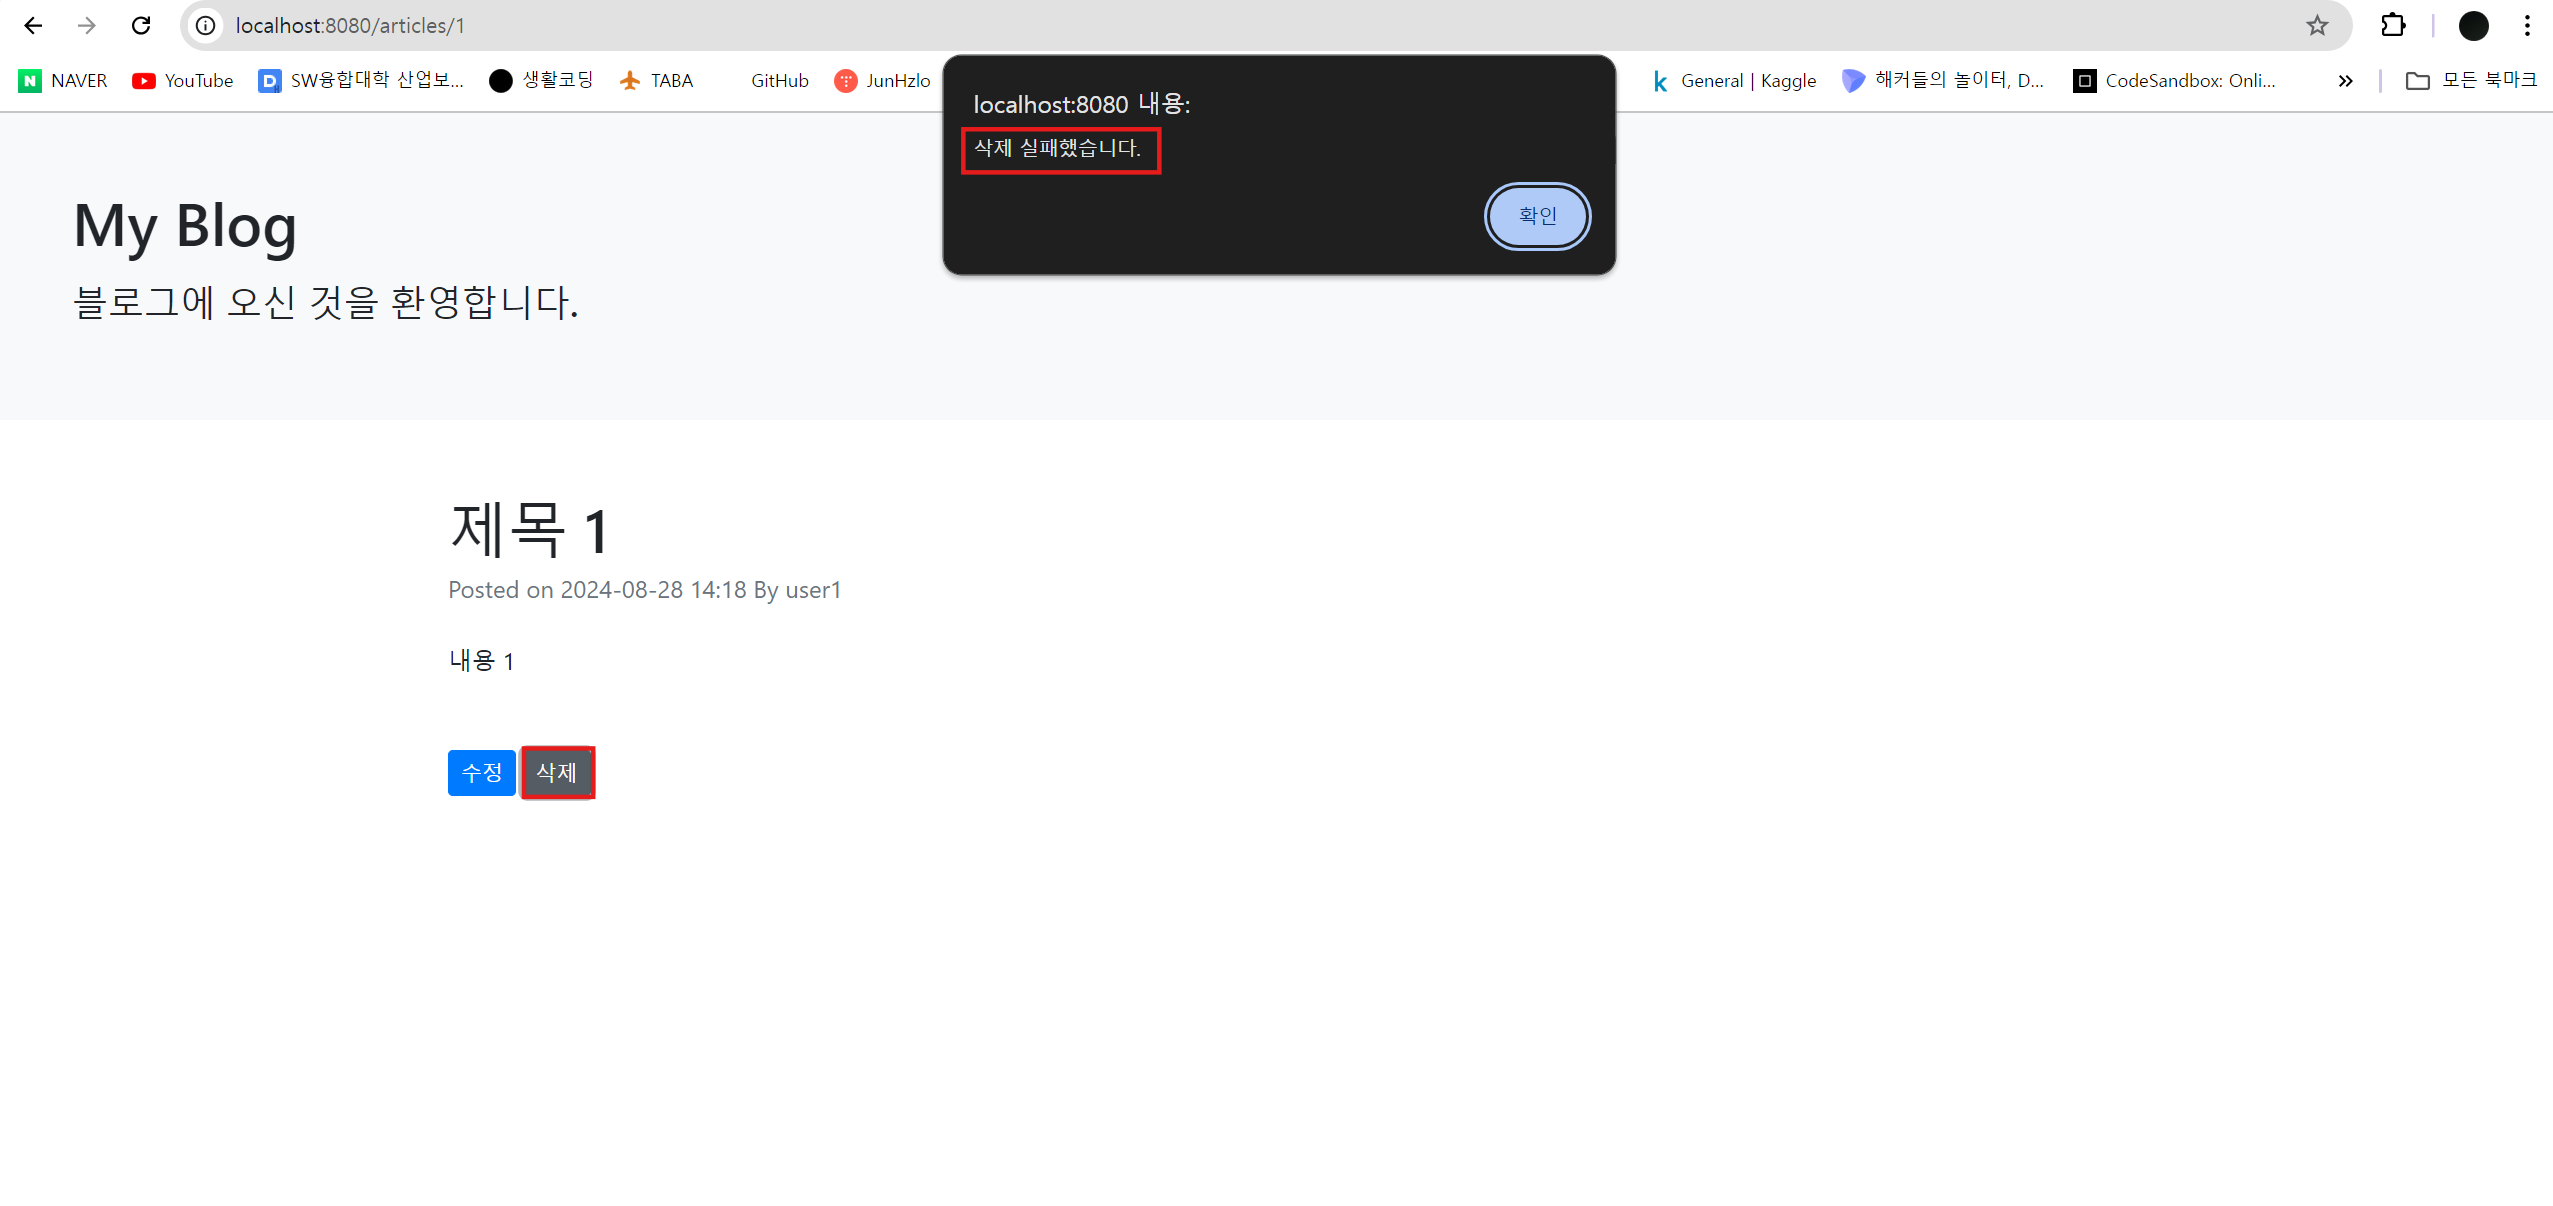
내가 작성하지 않은 글을 수정하고 삭제하면,
위와 같이 삭제가 되지 않는 것을 확인할 수 있다. (수정도 마찬가지)
4. 테스트 코드 작성하기
◆ BlogApiControllerTest.java
@SpringBootTest
@AutoConfigureMockMvc
class BlogApiControllerTest {

    @Autowired
    protected MockMvc mockMvc;

    @Autowired
    protected ObjectMapper objectMapper;

    @Autowired
    private WebApplicationContext context;

    @Autowired
    BlogRepository blogRepository;

    @Autowired
    UserRepository userRepository;

    User user;

    @BeforeEach
    public void mockMvcSetUp() {
        this.mockMvc = MockMvcBuilders.webAppContextSetup(context)
                .build();
        blogRepository.deleteAll();
    }


    @BeforeEach
    void setSecurityContext() {
        userRepository.deleteAll();
        user = userRepository.save(User.builder()
                .email("user@gmail.com")
                .password("test")
                .build());

        SecurityContext context = SecurityContextHolder.getContext();
        context.setAuthentication(new UsernamePasswordAuthenticationToken(user, user.getPassword(), user.getAuthorities()));
    }


    @DisplayName("addArticle: 아티클 추가에 성공한다.")
    @Test
    public void addArticle() throws Exception {
        // given
        final String url = "/api/articles";
        final String title = "title";
        final String content = "content";
        final AddArticleRequest userRequest = new AddArticleRequest(title, content);

        final String requestBody = objectMapper.writeValueAsString(userRequest);

        Principal principal = Mockito.mock(Principal.class);
        Mockito.when(principal.getName()).thenReturn("username");

        // when
        ResultActions result = mockMvc.perform(post(url)
                .contentType(MediaType.APPLICATION_JSON_VALUE)
                .principal(principal)
                .content(requestBody));

        // then
        result.andExpect(status().isCreated());

        List<Article> articles = blogRepository.findAll();

        assertThat(articles.size()).isEqualTo(1);
        assertThat(articles.get(0).getTitle()).isEqualTo(title);
        assertThat(articles.get(0).getContent()).isEqualTo(content);
    }

    @DisplayName("findAllArticles: 아티클 목록 조회에 성공한다.")
    @Test
    public void findAllArticles() throws Exception {
        // given
        final String url = "/api/articles";
        Article savedArticle = createDefaultArticle();

        // when
        final ResultActions resultActions = mockMvc.perform(get(url)
                .accept(MediaType.APPLICATION_JSON));

        // then
        resultActions
                .andExpect(status().isOk())
                .andExpect(jsonPath("$[0].content").value(savedArticle.getContent()))
                .andExpect(jsonPath("$[0].title").value(savedArticle.getTitle()));
    }

    @DisplayName("findArticle: 아티클 단건 조회에 성공한다.")
    @Test
    public void findArticle() throws Exception {
        // given
        final String url = "/api/articles/{id}";
        Article savedArticle = createDefaultArticle();

        // when
        final ResultActions resultActions = mockMvc.perform(get(url, savedArticle.getId()));

        // then
        resultActions
                .andExpect(status().isOk())
                .andExpect(jsonPath("$.content").value(savedArticle.getContent()))
                .andExpect(jsonPath("$.title").value(savedArticle.getTitle()));
    }


    @DisplayName("deleteArticle: 아티클 삭제에 성공한다.")
    @Test
    public void deleteArticle() throws Exception {
        // given
        final String url = "/api/articles/{id}";
        Article savedArticle = createDefaultArticle();

        // when
        mockMvc.perform(delete(url, savedArticle.getId()))
                .andExpect(status().isOk());

        // then
        List<Article> articles = blogRepository.findAll();

        assertThat(articles).isEmpty();
    }


    @DisplayName("updateArticle: 아티클 수정에 성공한다.")
    @Test
    public void updateArticle() throws Exception {
        // given
        final String url = "/api/articles/{id}";
        Article savedArticle = createDefaultArticle();

        final String newTitle = "new title";
        final String newContent = "new content";

        UpdateArticleRequest request = new UpdateArticleRequest(newTitle, newContent);

        // when
        ResultActions result = mockMvc.perform(put(url, savedArticle.getId())
                .contentType(MediaType.APPLICATION_JSON_VALUE)
                .content(objectMapper.writeValueAsString(request)));

        // then
        result.andExpect(status().isOk());

        Article article = blogRepository.findById(savedArticle.getId()).get();

        assertThat(article.getTitle()).isEqualTo(newTitle);
        assertThat(article.getContent()).isEqualTo(newContent);
    }

    private Article createDefaultArticle() {
        return blogRepository.save(Article.builder()
                .title("title")
                .author(user.getUsername())
                .content("content")
                .build());
    }
}
위와 같이 테스트 코드를 수정한다.
- setAutentication() 메서드
인증 객체를 저장하는 시큐리티 콘텍스트에 setAuthentication() 메서드를 사용해 테스트 유저를 지정한다. - Principal 객체
글을 생성하는 API에서는 파라미터로 Principal 객체를 받고 있는데,
이 객체에 테스트 유저가 들어가도록 모킹 한다.
테스트 코드에서는 Principal 객체를 모킹 해서 스프링 부트 애플리케이션에서 getName() 메서드를 호출하면,
"userName"이라는 값을 반환한다.
Principal 객체란? : 스프링 시큐리티에서 현재 인증된 사용자를 나타내는 객체이다.
principal.getName() 메서드를 호출하면 현재 로그인한 사용자의 name(ID)를 알 수 있다. - createDefaultArticle() 메서드
중복 코드를 제거하기 위해 만든 글을 만드는 로직
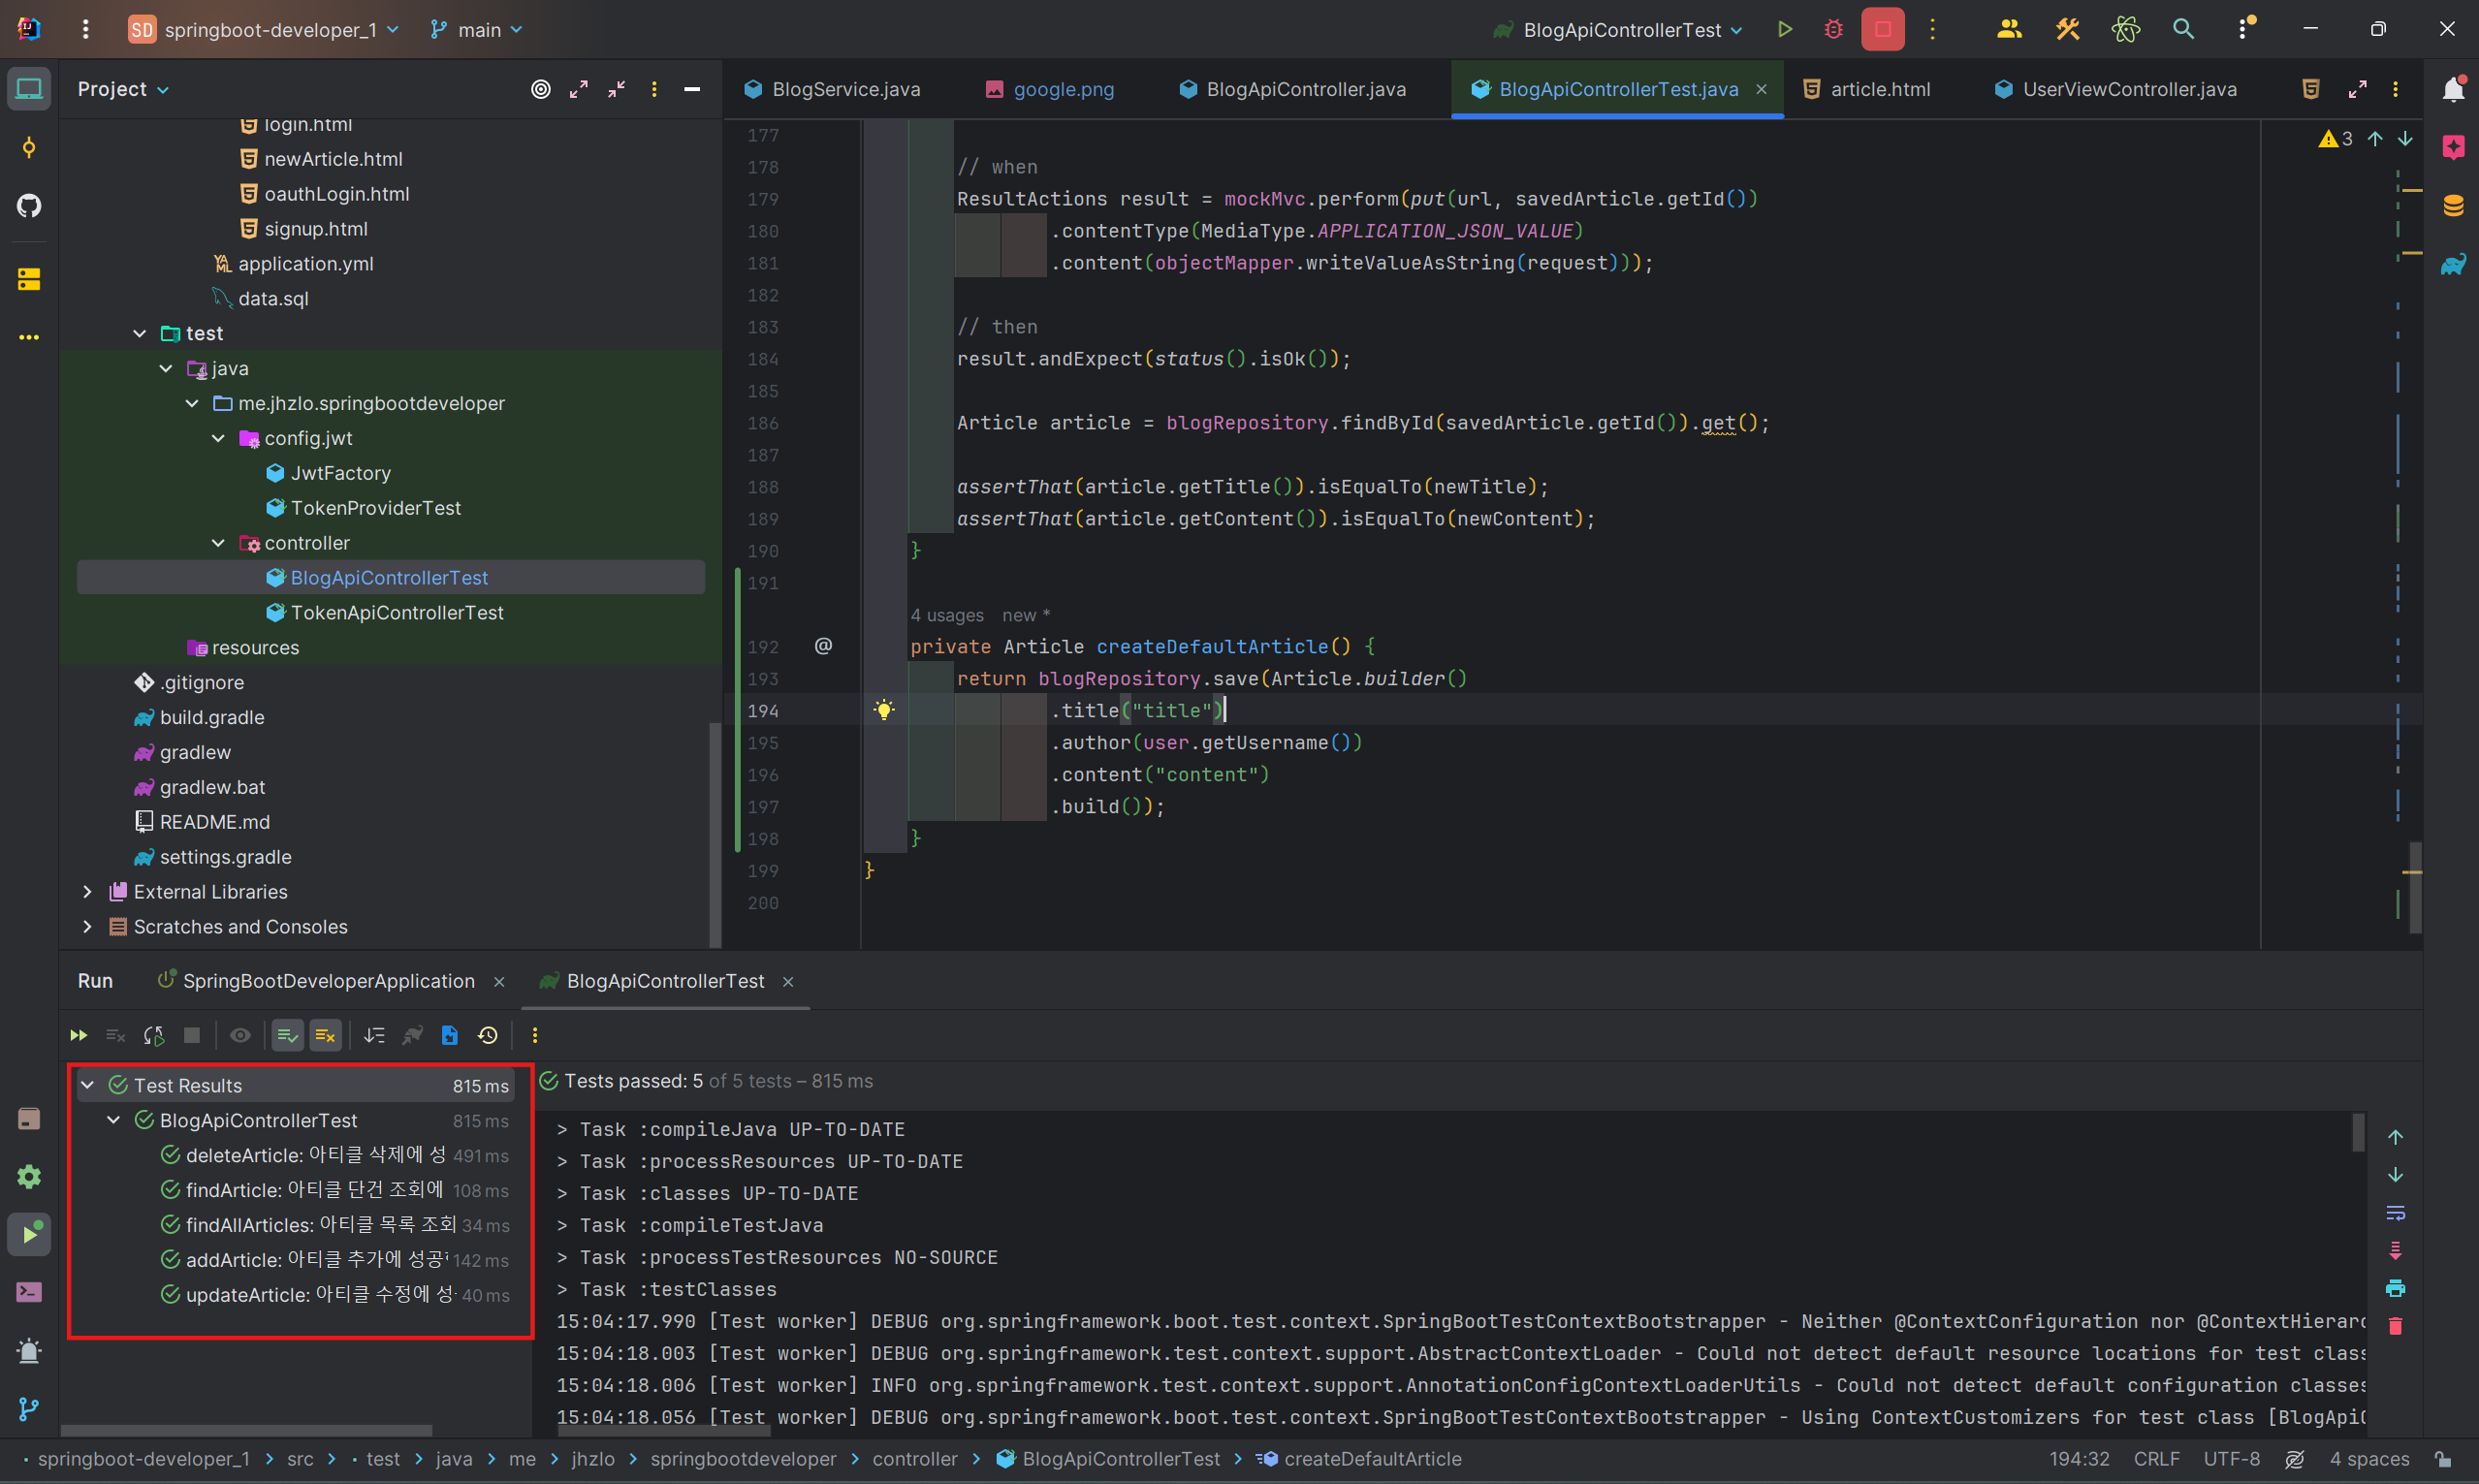
테스트 코드를 실행시키면 다음과 같이 모두 성공하는 것을 확인할 수 있다.
☆ 정리
- OAuth2 + JWT + 스프링 시큐리티의 조합으로 인증서비스를 구현하였다.
- 쿠키란 사용자가 어떠한 웹사이트를 방문했을 때,
그 웹사이트가 사용하는 서버를 통해 로컬에 저장되는 작은 데이터이다.
쿠키는 키와 값으로 이루어져 있으며 만료 기간, 도메인 등의 정보를 가지고 있다. - OAuth는 제3의 서비스에게 계정을 맡기는 방식이다.
OAuth에서 정보를 취득하는 방법- 권한 부여 코드 승인 타입
- 암시적 승인 타입
- 리소스 소유자 암호 자격증명 승인 타입
- 클라이언트 자격증면 승인 타입
- OAuth 방식 중 권한 부여 코드 승인 타입은 클라이언트가 리소스에 접근하는 데 사용되면,
권한에 접근할 수 있는 코드를 제공받으면 리소스 오너에 대한 액세스 토큰을 제공받는다.
출처:https://github.com/shinsunyoung/springboot-developer
'Java & Kotlin > Spring' 카테고리의 다른 글
| [Kotlin + Spring] MSA 환경에서 토큰 기반 인증 구현하기 (RTR, JWT vs UUID, Redis) (1) | 2025.02.20 |
|---|---|
| [스프링 부트 3] OAuth2 - 2 (스프링 시큐리티로 OAuth2 서비스 구현, 로직 세팅) (2) | 2024.08.27 |
| [스프링 부트 3] OAuth2 - 1 (OAuth란?, 권한 부여 코드 타입 승인의 흐름, 쿠키란?, 토큰 발급받기) (0) | 2024.08.23 |
| [스프링 부트 3] JWT - 3 (토큰 필터, 리프레시 토큰 API 구현하기, 로그인/로그아웃) (0) | 2024.08.22 |
| [스프링 부트 3] JWT - 2 (JWT 서비스, 토큰 생성자 구현, 로그인/로그아웃) (0) | 2024.08.22 |